
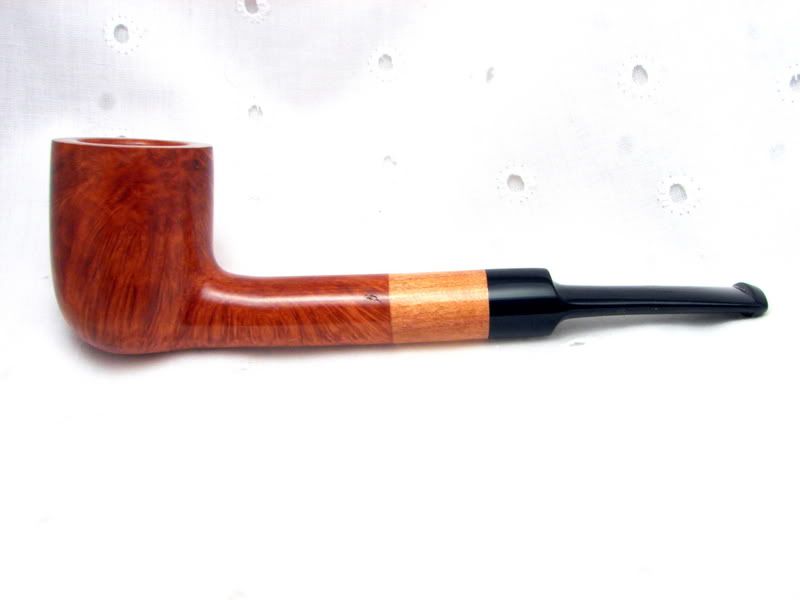
Here's my latest bout with last-stage-of-sanding flaws:
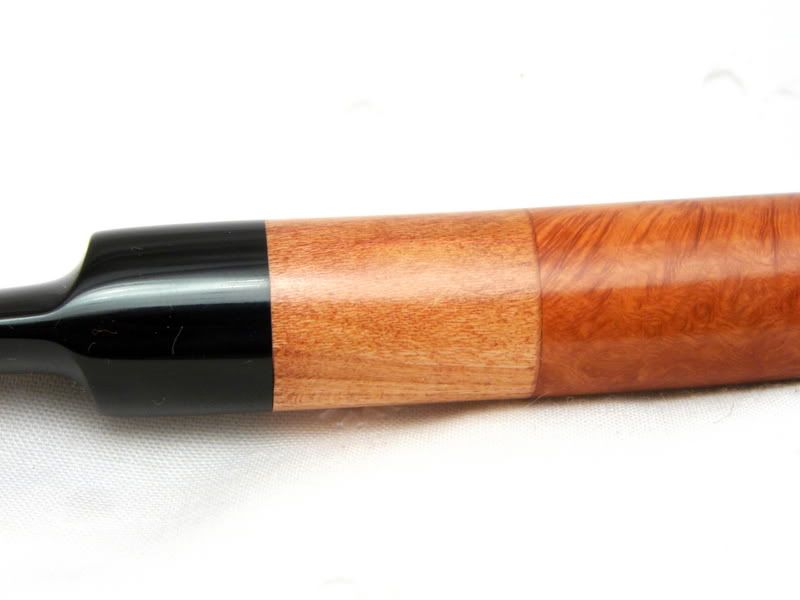
close up of the Almond wood extension:
I know I should have rusticated it, but, the almond would've gotten lost, I fear.
--Michael

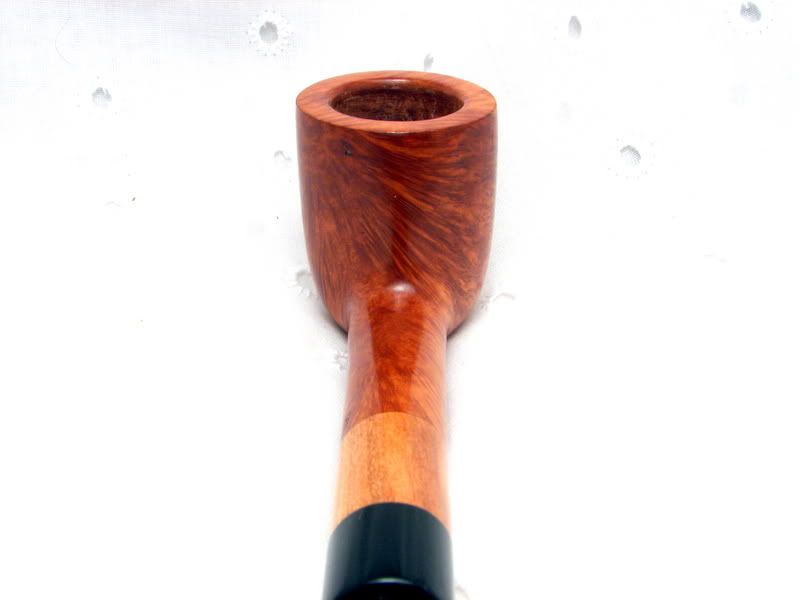
Thanks for the comments, Kurt,KurtHuhn wrote:Is the pipe ever so slightly bent, or is that a parallax error from the lens?
Either way, the pipe looks good. The last minute sanding flaws can be a real bugger. I nearly had one the other day, but I decided to see if I could sand it out - I had to change the shape of the pipe slightly, but I did manage to work through it.
Some thoughts:
- The length of the shank+almond seems a little long to me. I think it might have to do with the difference in length between the briar shank, the almond adornment, and the round part of the stem. On a taper stem, it might not be as noticeable. With a saddle bit, I think that the almond would flow better if it was teh same length as the round part of the bit.
Hmmm. I'm not quite with you on this one. If I'd done that the pipe would have been too short. As it is, the pipe is only 5-5/8" long. A shorty at best. Up close it seems to have a better appearance than in the pictures. Thanks anyway, that should help with a longer/larger pipe.
- The saddle part of the stem also seems a bit long to me. It sort of reminds me of a tall, lanky, and awkward teenager - someone who's arms and legs are too long for their body. I think the whole shape would flow much better if the saddle portion was about half as long.
The bowl actually lines up with the bottom of the shank. It may be the fact that it's a "1/16th" bent pipe that is throwing perspective off in the picture(s). As far as making the bottom of the bowl too thick, I'm guilty as charged. This is pipe number 40; so I've got a ways to go still. Not much time these days to get even a couple of pipes per month made, with overtime at work mandatory!- this may just be a photographic artifact, but it looks like the bottom of the bowl drops slightly below the shank. This can be done with great effectiveness on some pipes, and is useful on pipes with very thin shanks like bamboo. However, on a pipe with a shank as thick as this, it looks a little awkward.
I hear what you're saying. I'm getting there, but it takes trial and error on my part to crawl along. I think it was Stephen Downey that said it takes 200 pipes under your belt before you really start "getting it"!The reason why this happens a lot on beginning pipe makers is because they're afraid to make the bottom of the bowl too thin - they don't want a burnout at the heel. However, as long as your drilling is straight, that should never happen on a pipe with a nice thick shank like this. Let's use Jeff Gracik as an example again (sorry, Jeff):
http://www.jalanpipes.com/168%20Gallery.html
Even with a thin, oval shank, the heel of the bowl is right in line with the bottom of the shank. Part of this is, undoubtedly, due to the shape of bit that Jeff used to drill the tobacco chamber - I'll wager that it is more conical than cylindrical, which allows for greater freedom in bringing the heel up to meet the shank.
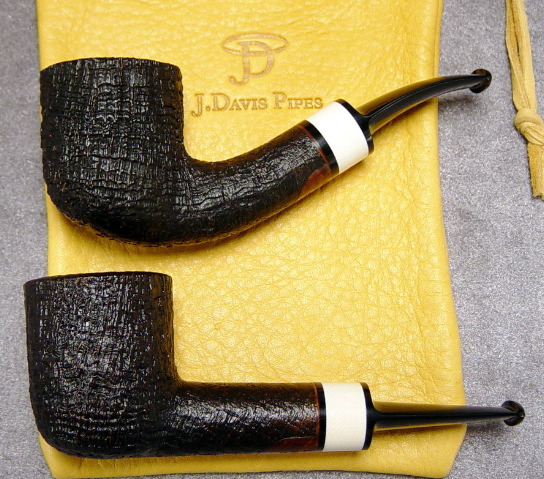
On a bent pipe, you can even move the heel of the bowl back towards the shank. Let's pick on Jody Davis this time:
http://www.jdavispipes.com/images/Pipes/58.jpg
Notice how, in the top pipe, the heel of the bowl is not directly centered on the tobacco chamber. It's actually moved back towards the bit, providing flow and an uninterrupted path from one end of the pipe to the other.
(And this is for all aspiring pipe makers)
Now, remembering that the above is just my opinion, I'd suggest you look at the pipes that you find yourself saying "If money was no object, I would buy that pipe and smoke it every day!". Look at the lines of the pipe, the proportions of the various components, and try to to incorporate what really draws you to the pipe into your own creations. My own work took leaps and bounds when I stopped looking at a pipe as a whole, and more as a collection of constituent parts - once you break it down, and you start to see the proportions and flow, I think you'll find yourself making pipes that surprise you!
I think that's pretty close to reality. Unless you're some sort of wunderkind, or have had previous artistic training, it takes time to develop the understanding that you need to make an artistic object. I make no claims to actually possessing that understanding either.....I hear what you're saying. I'm getting there, but it takes trial and error on my part to crawl along. I think it was Stephen Downey that said it takes 200 pipes under your belt before you really start "getting it"!
I'm always afraid that I'm coming across as a know-it-all, or that I might be too harsh in my critique. That's my midwestern reserve and humility, I guess.Thanks again, Kurt. I appreciate the time you put into some valuable constructive criticism. It helps, believe me...