
Gentlemen, experts, newbies, et al,
I've got a general staining question. What kind of brush or method of application do you use for your stain?
I've used a Q-tip and a brush. I find that the brush applies the stain more liberally, but that it is easier to get a more even stain with the Q-tip.
How even should the stain be prior to hitting the stummel with tripoli?
Is it a problem that most of the stain is dry by the time that I've completed staining it? I've never even had the chance to burn it off, b/c it is dry by the time I would need to try it.
Thanks,
Jeff
Even staining
-
Tyler

- Site Supporter
- Posts: 2376
- Joined: Thu Nov 23, 2006 8:00 pm
- Location: Farmersville, TX
- Contact:
I just use abrush that I stole from my daughters' arts and crafst cabinet. It is just a cheap bruxh like you might expect to find in a set of $1.50 water colors.
I just liberally slap the stuf on the pipe, over and over, until I have it as dark as I want it. After it has dried completely, I buff. No worries about evenness, usually.
When the stain is uneven it could be because of uneven sanding, oil from your hands on some parts of the pipe, or the nature of the briar to absorb better in some places rather than others.
Tyler
Tyler Lane Pipes
http://www.tylerlanepipes.com
http://www.tylerlanepipes.com
-
Jeffery_Suter

- Posts: 81
- Joined: Thu Nov 23, 2006 8:00 pm
- Location: NJ - NYC
- Contact:
I've used a Q-Tip, a pipe cleaner, a small paint brush and a painting sponge pad... the pad works well, but if you don't completely wash it out with alcohol afterward, it's trashed...
Not worth the time and effort to me, so I stick with a Q-Tip... good control, and cheap.
Once it's fairly even, I go to a 600 sanding (sometimes a 400) and buff it out... If I want to do a top stain in a different color, I now do that and repaeat the sand and buff...
You have to experiment... I don't believe there are any right or wrongs with this stage...

I use leather dye and the wool daubers that come with them. They seem to work really well.
I sand the pipe to 400 grit then I stain it. At that point I dont worry too much about it being even just that there are no missed areas. I actually stain it pretty dark.
Then I sand it down again with 400 grit. This allows me to see my sanding marks and get rid of them. Also it really makes the grain very defined and crisp. I do this until I get a good contrast and a very even tone across the entire surface of the pipe.
Then I burnish the surface with 600 and 800 grit sandpaper. (If there are any sanding marks at this point I go back to 400 in that area and eliminate them. )
Then I buff the pipe with tripoli, white, and wax it.
My smooth pipes are actually just barely stained, as a lot of it is removed by re-sanding and the highlighted areas of grain are mainly colored with the tripoli.
I did this pipe that way:
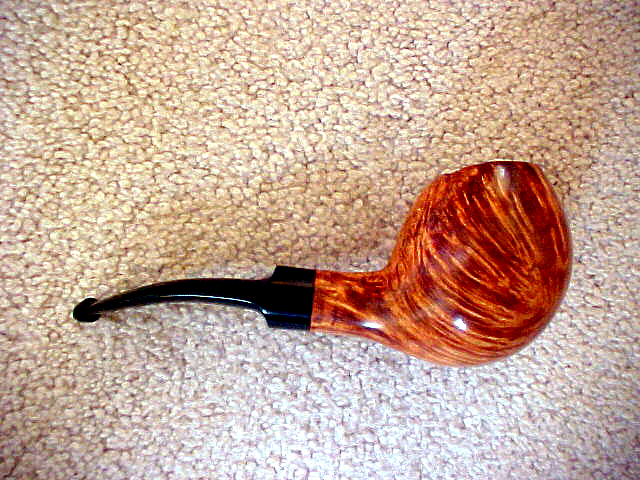
I brought this pipe to a local club meeting and a guy asked me what combination of colors I used for the contrast stain. He was surprised when I told him there was only one color and one application. I think he thought I was putting him on. I don't contrast stain I just use the sanding to get the contrast I want.
I sand the pipe to 400 grit then I stain it. At that point I dont worry too much about it being even just that there are no missed areas. I actually stain it pretty dark.
Then I sand it down again with 400 grit. This allows me to see my sanding marks and get rid of them. Also it really makes the grain very defined and crisp. I do this until I get a good contrast and a very even tone across the entire surface of the pipe.
Then I burnish the surface with 600 and 800 grit sandpaper. (If there are any sanding marks at this point I go back to 400 in that area and eliminate them. )
Then I buff the pipe with tripoli, white, and wax it.
My smooth pipes are actually just barely stained, as a lot of it is removed by re-sanding and the highlighted areas of grain are mainly colored with the tripoli.
I did this pipe that way:
I brought this pipe to a local club meeting and a guy asked me what combination of colors I used for the contrast stain. He was surprised when I told him there was only one color and one application. I think he thought I was putting him on. I don't contrast stain I just use the sanding to get the contrast I want.
John
www.crosbypipes.com
www.crosbypipes.com
-
KurtHuhn

- Site Admin
- Posts: 5326
- Joined: Thu Nov 23, 2006 8:00 pm
- Location: United States/Rhode Island
I usually, sand to 600, apply the stain with a watercolor brush (5 for $1.49 at the pharmacy) and then sand with higher grits. The stain helps me see where I need to focus on the surface. Then, if the stain needs darkening or a topstain is needed, I apply it and then buff with compounds.
Note, I said usually. There are times where I do things differently, either as an experiment or whatever.
I've used, in the past, cotton balls, rags, and Q-tips to apply the stain. None of them gave me the control I found when I started using brushes. I also use a *lot* les stain than wtih cotton balls, and the stain seems more even to me. YMMV, however, and you should experiment and find the tools and methods that work for you.
I've used both q-tips and brushes as I mentioned above. I usually sand to 600 prior to going to the staining stage. I think the question I meant to ask, or should have prefaced my other question with is, do you all have problems with thick "dry lines?" I'm sure that is not descriptive enough. What I mean by that is the darker lines of stain that appear when some dries before it is spread thoroughly? I didn't think that this was much of a problem because I've typically taken care of it by applying more stain to even things out, but after finishing my last pipe I noticed a subtle remainder (very very subtle) of one of these stain lines. To be clear, it is not a defined line, as if it were in a pit or crack or unsanded portion, but an overapplication of stain. I had thought that buffing would take care of it, and it mostly did, but I guess that I should have buffed longer or used the method mentioned above of using an alcohol wipe to spread things out. That's a great idea by the way and I will certainly give it a shot when I finish pipe #5 next weekend! Only 1 more week of finals and I am free to work on pipes again! I can't wait!
Jeff
Jeff
I do get those and they do bother me. The best way that I have found to avoid them is to work fast and when you see them develope rub that area with you brush to blend it and keep it from drying with that overlap. That seems to keep it to a minimum, at least enough that it will sand or buff out.
John
www.crosbypipes.com
www.crosbypipes.com