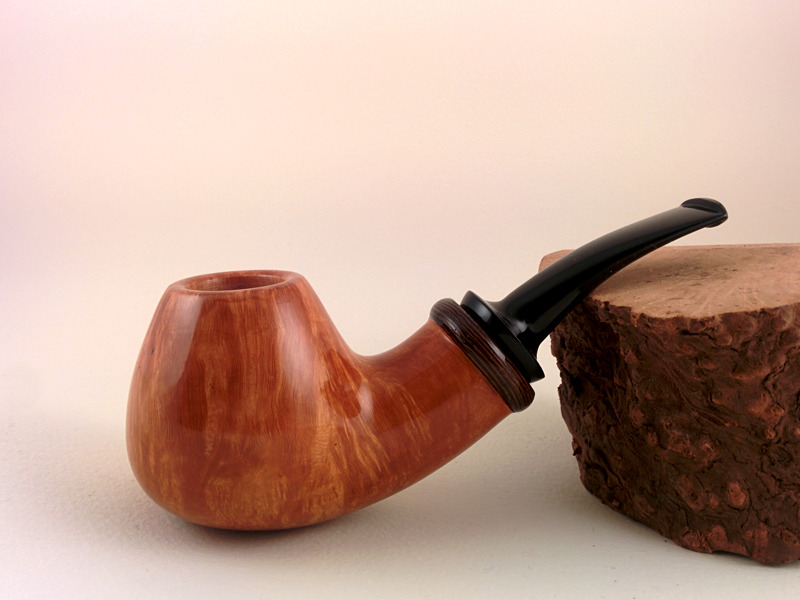
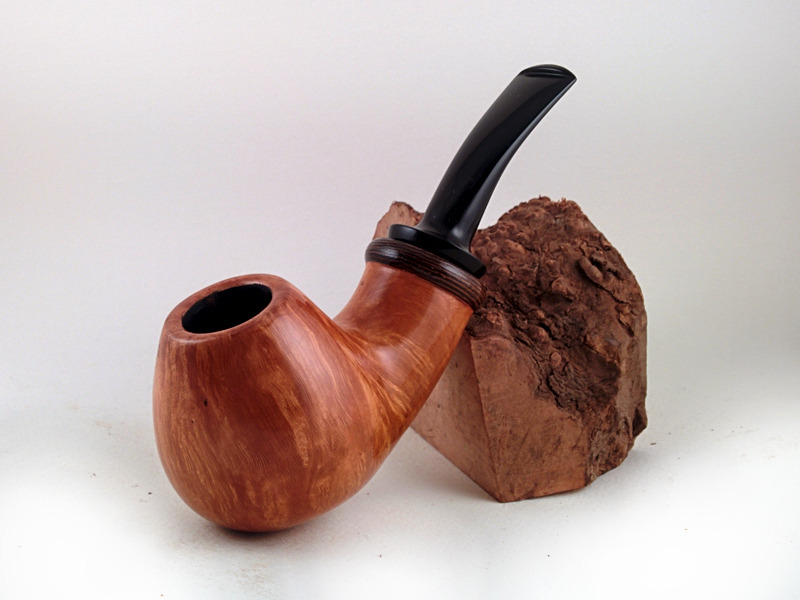
bent brandy with wenge

Want to show you work to the world? Want a place to post photos of your work and solicit the opinions of those that have gone before you? Post your work here.
Post Reply
User avatar
seamonster
Posts: 380
Joined: Fri Feb 21, 2014 12:43 am
Location: Portland, OR

bent brandy with wenge

Post by seamonster »

Ladies & Gentlemen,

Here is my latest.
Taking a little break from the bamboo experiment.
This is my first attempt at an accent ring, and it was.... just okay.
I certainly figured some things to do differently next time.... and any advice for doing rings would be welcomed!

Following, are what I know need improvement, I'd love to hear what else you
think I need to improve on:
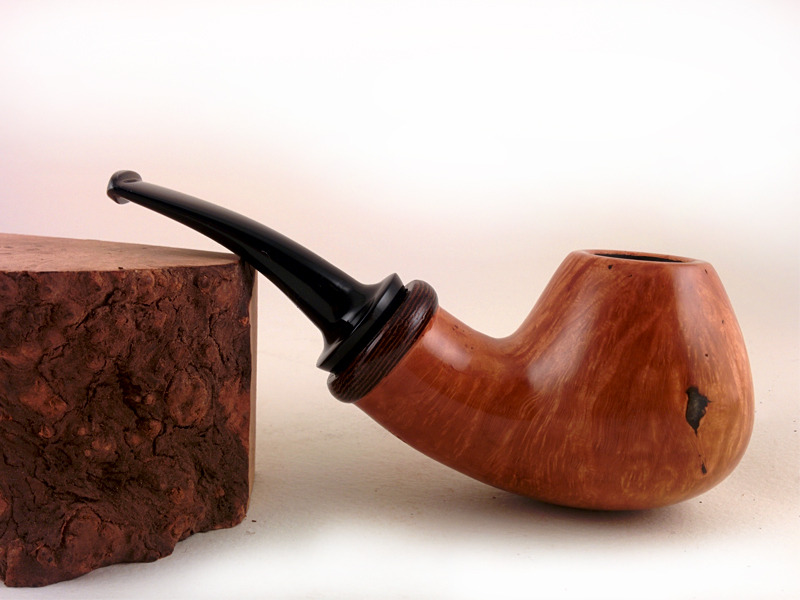
- there are obvious sand pits, and one mega one on the side, but, still good or a shaping and finishing exercise
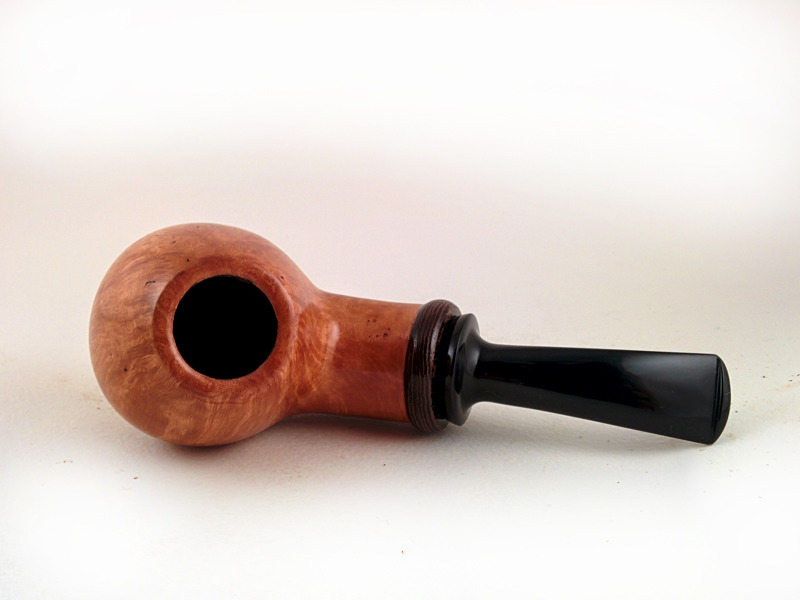
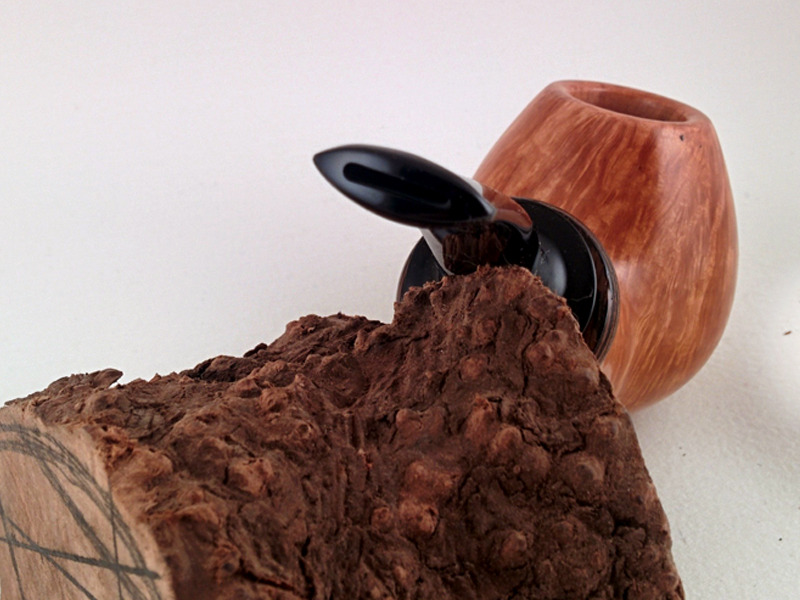
- there is a slight file divot just outside the accent ring. I left it, rather than create a larger step down from the ring
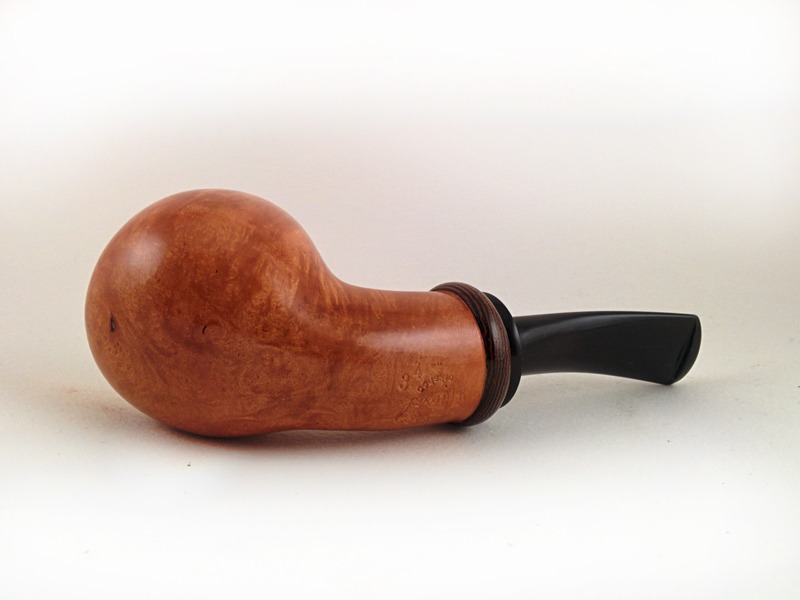
- there is a slight bulge on the stem, at the flare, need to shape it smoother next time...


I appreciate the time and the comments and critique.

Let me have it! Don't hold back...

cheers,
Jeremy.


Image
Image
Image
Image
Image
Image
instagram.com/seamonster_workshop/
wdteipen
Posts: 2817
Joined: Sat Mar 29, 2008 1:05 pm

Re: bent brandy with wenge

Post by wdteipen »

Not bad. The profile of the ring looks good. I think they look best when they start rounding right where they meet the shank like you did and don't stick out far past the diameter of the stummel. I think it would look better if the thickness of the ring was about half as thick as it is and, as you mentioned, sanded smoother with all the tool marks removed. I like how you lined up the grain on the wenge. Stemwork looks pretty good although I think it would look better if the part leading from the base to the flare did one of two things; either angle less steep or be concave.
Wayne Teipen
Teipen Handmade Briar Pipes
http://www.teipenpipes.com
User avatar
sandahlpipe
Posts: 2106
Joined: Mon Feb 04, 2013 8:49 pm
Location: Zimmerman, MN
Contact:

Re: bent brandy with wenge

Post by sandahlpipe »

What bothers me about this shape is the bowl/shank junction. Try to bring out more definition between the shank and the bowl and you will be surprised at how much cleaner the shaping looks.

What doesn't bother me is the sand pits. Actually, I applaud you for not trying to change the shape to try and get rid of the pits. I would, however, recommend staining it darker to minimize the appearance of the pits and/or rusticating/sandblasting the pipe.

Keep up the good work!
---
Fail early, fail often. Your success depends on it.

Jeremiah Sandahl
http://sandahlpipe.com
scotties22
Posts: 1767
Joined: Mon Jun 11, 2012 9:43 pm
Location: Missouri
Contact:

Re: bent brandy with wenge

Post by scotties22 »

sandahlpipe wrote:I would, however, recommend staining it darker to minimize the appearance of the pits and/or rusticating/sandblasting the pipe.
This bothers me a bit. It is advise that is given all the time to newer carvers here on the board. (I don't know how many pipes Jeremy has made, so am just lumping him in as "newer") Until you can make straight lines straight and round things round and get all the other basics down the grain and pits and all that other crap should NOT be a worry. You want to give me that advise, go for it....I've been doing this for three years and have advanced to that point.


Jeremy, the finish looks good. I think Wayne and Jeremiah hit most everything. I still really struggle with the bowl/shank transition on bent pipes. I have a hard time removing enough material to make things flow. Nice button :wink:
Am I Calamity Jane or Annie Oakley??...depends on the day.
www.ladybriar.com
User avatar
seamonster
Posts: 380
Joined: Fri Feb 21, 2014 12:43 am
Location: Portland, OR

Re: bent brandy with wenge

Post by seamonster »

wdteipen wrote: Stemwork looks pretty good although I think it would look better if the part leading from the base to the flare did one of two things; either angle less steep or be concave.
Thanks Wayne, I appreciate the feedback. And I totally agree with you on the stem flare. It's funny you say that, as I've just made a few stems that have a concave flare, and I was trying to make this one a bit straighter, and I got caught in that weird middle ground. Not totally sure what it wants to be. I think, since this pipe seems to have an overall 'chubby' look, that a straighter flare would be better. I think a concave would look too decorative and elegant, two things that this pipe is not trying to be. Again, thanks for taking the time to give me some feedback. I'll put it to work on the next one.
instagram.com/seamonster_workshop/
User avatar
seamonster
Posts: 380
Joined: Fri Feb 21, 2014 12:43 am
Location: Portland, OR

Re: bent brandy with wenge

Post by seamonster »

sandahlpipe wrote:What bothers me about this shape is the bowl/shank junction. Try to bring out more definition between the shank and the bowl and you will be surprised at how much cleaner the shaping looks.
Thanks for the feedback, Jeremiah! I have two blocks drawn up, to get working on, with the express purpose of really working on the bowl to shank junction.

For this pipe, I purposefully left it a little pudgy, as that was the 'personality' I had in mind for this one, a bit slouchy, a little puffy. I thought the extreme taper on the bowl, looked rather dumpy, like a big ass on a couch, so I wanted everything to have that sort of feel. I left the 'waist' of the stem a bit plumper, for this reason too.

THAT being said, if my purpose didn't come across, and from the viewers point of view, the junction needs to crisp up, then that's what I work on next. Ever forward.

Thanks again!
instagram.com/seamonster_workshop/
User avatar
seamonster
Posts: 380
Joined: Fri Feb 21, 2014 12:43 am
Location: Portland, OR

Re: bent brandy with wenge

Post by seamonster »

scotties22 wrote:
Jeremy, the finish looks good. I think Wayne and Jeremiah hit most everything. I still really struggle with the bowl/shank transition on bent pipes. I have a hard time removing enough material to make things flow. Nice button :wink:

Much appreciated, Scottie! I am a newer carver, I think this particular one is No. 34. I definitely consider myself a pipe toddler..... I'm not concerned with the pits, or grain. I mean, I try to at least consider it, when I'm laying out the design, but I'm not tossing any half finished stummels when a pit appears. There is too much valuable practice left, so I'd rather finish it up. Besides, none of these are for sale, nor would they ever be. But, I get plenty of opportunity to smoke the stuffing out of these things, to get a sense of how they perform..... lucky me!

I quite like the last few bents you've posted on IG, I've screenshoted them to save in my reference file. Hope you don't mind.

Apologies up front, I'm internet-missing the meaning of your wink. I've been working extra hard on button shaping and feel like I've got a nice, properly proportioned, good mouth-feel shape going. Do you agree? or are you razzing me? Sorry....

Thanks for the feedback! I appreciate the comments.
cheers, Jeremy.
instagram.com/seamonster_workshop/
scotties22
Posts: 1767
Joined: Mon Jun 11, 2012 9:43 pm
Location: Missouri
Contact:

Re: bent brandy with wenge

Post by scotties22 »

I'm not razzing you at all, I promise :D . It really is a nicely done button and slot. You have left it big enough to stand the test of time...and buffings. And yet it looks small enough to be comfortable between the teeth. Your slot looks good and from what I can tell in the picture your funnel work looks good as well.
Am I Calamity Jane or Annie Oakley??...depends on the day.
www.ladybriar.com
User avatar
sandahlpipe
Posts: 2106
Joined: Mon Feb 04, 2013 8:49 pm
Location: Zimmerman, MN
Contact:

Re: bent brandy with wenge

Post by sandahlpipe »

seamonster wrote:
scotties22 wrote: Besides, none of these are for sale, nor would they ever be. But, I get plenty of opportunity to smoke the stuffing out of these things, to get a sense of how they perform..... lucky me!
If you're not selling them, then don't worry about the finish.

If you were aiming at making the pipe look like a big butt on the couch, I think you've hit your mark. At that point, it's a taste thing.

Still, you're on the right path to practice getting a nice bowl/shank junction with the next couple blocks. Keep it up.
---
Fail early, fail often. Your success depends on it.

Jeremiah Sandahl
http://sandahlpipe.com
User avatar
seamonster
Posts: 380
Joined: Fri Feb 21, 2014 12:43 am
Location: Portland, OR

Re: bent brandy with wenge

Post by seamonster »

scotties22 wrote:I'm not razzing you at all, I promise :D . It really is a nicely done button and slot. You have left it big enough to stand the test of time...and buffings. And yet it looks small enough to be comfortable between the teeth. Your slot looks good and from what I can tell in the picture your funnel work looks good as well.
oh phew! you mentioned all the things I've been focusing on. I'm a clencher, and I chomp down with the button in the middle of my molars. a too tall button is very uncomfortable for me, but I recognize the necessity of leaving enough material there so as not to loser the button all together down the road..

Thanks! but maybe secretly, I was hoping for a little raz....
instagram.com/seamonster_workshop/
Charl
Posts: 1901
Joined: Mon Jan 07, 2008 3:03 pm
Location: South Africa

Re: bent brandy with wenge

Post by Charl »

Bowl/shank for me is not a problem at all. Like Wayne said, the thickness of the shank ring is, as well as the stem when seen from above (or below, if you want.
For now, don't worry about the cracks, pits etc in the wood. Just enjoy yourself and get your hands in the motion and your "eyes in the flow".
User avatar
seamonster
Posts: 380
Joined: Fri Feb 21, 2014 12:43 am
Location: Portland, OR

Re: bent brandy with wenge

Post by seamonster »

Charl wrote:Bowl/shank for me is not a problem at all. Like Wayne said, the thickness of the shank ring is, as well as the stem when seen from above (or below, if you want.
For now, don't worry about the cracks, pits etc in the wood. Just enjoy yourself and get your hands in the motion and your "eyes in the flow".
Thanks Charl!
I understand about the shank ring, will make the next one thinner...
but to clarify on the stem:
Are you saying it flares too much at the bite zone? That it should be less tapered?
cheers,
Jeremy.
instagram.com/seamonster_workshop/
Charl
Posts: 1901
Joined: Mon Jan 07, 2008 3:03 pm
Location: South Africa

Re: bent brandy with wenge

Post by Charl »

If you look at the stem from above, it flares quite abrubtly from tenon to bit. It doesn't gel that well with your thick shank. What should be more harmonious, like Wayne said, is when the the flare is less or concave instead of straight sided.
User avatar
Ratimus
Posts: 337
Joined: Mon Jan 20, 2014 12:55 pm

Re: bent brandy with wenge

Post by Ratimus »

Question: Did you shape the pipe with the ring glued in place? It looks like you've got a fillet where the shank rounds up to meet the ring, rather than a sharp, well-defined transition.

If this is the case, obviously you don't want to shape the shank without something on the end or you will round over the corners onto the face. It might help to attach another piece of briar same size as the shank when shaping there (use a Delrin tenon).
Ryan Richardson
R2 Pipes/Ryan's Luxury Goods
______________________________________
"You can't convince a stupid person that what he's doing is stupid, because the stupidness inside him is telling him that it's smart"
Post Reply