Eliminating tiny light gaps
Posted: Sun Oct 22, 2023 10:45 am
I am working on a bamboo shanked pipe with a reverse tenon and have just glued on my 2mm plate ebonite spacer. After drilling my stem and fitting the stem, I have the most minimal of light gaps, and cannot seem to eliminate it.
While the stem material was still chucked into the wood lathe, I have tried drilling the mortise in the stem just a hair deeper than needed, and that did not work. I tried re-facing the stem with multiple different Forstner bits, and that did not work either. I also made sure to countersink the stem thinking that might be the problem. That also did not work.
My thought is that either the face of my bamboo was not perfectly square before i glued on the plate ebonite, or that the plate ebonite is not milled perfectly square, or that somehow in drilling, the Forstner bit is not cutting the ebonite perfectly square.
Here are some things I am thinking of trying to remedy this, and I would appreciate any advice as to whether or not you think this might work.
Definitely re-sharpening my Forstner bits.
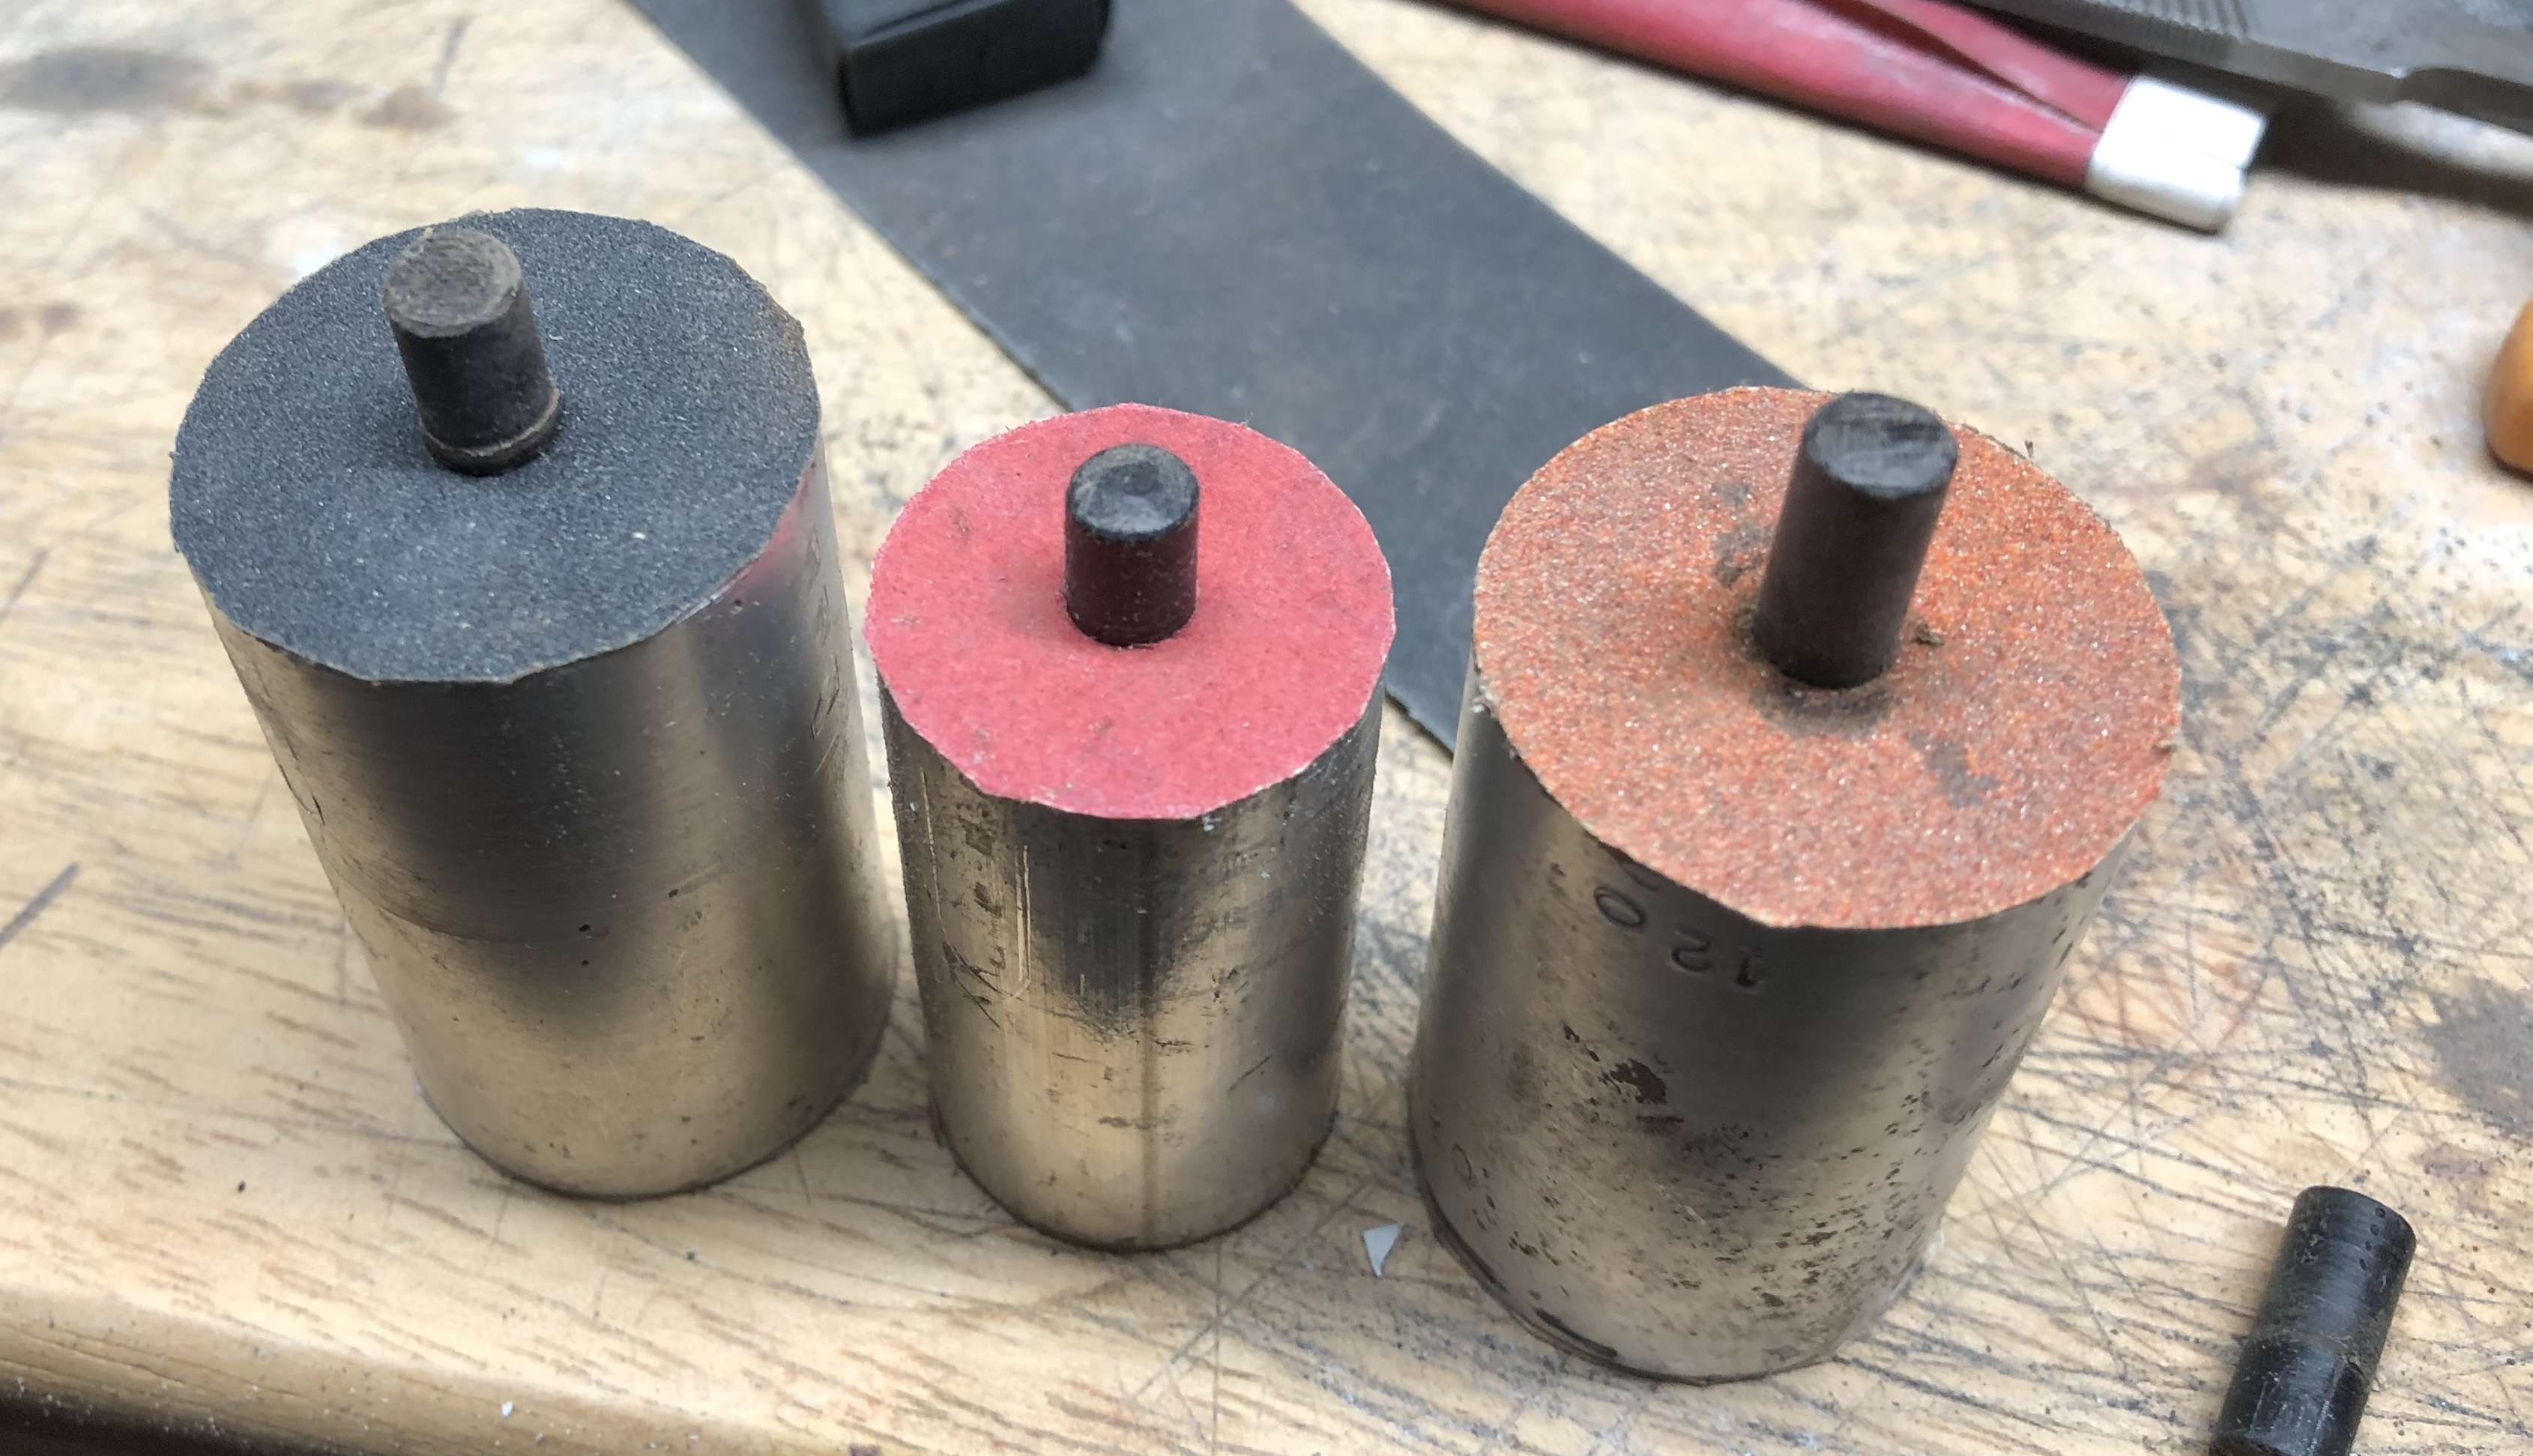
I am thinking of making a sanding ring by taking a scrap piece of ebonite, facing it, drilling out a mortise all the way through that is just slightly oversized to the normal 3/16, and then gluing a piece of sandpaper that has been hole punched at 3/16 on the face of the sanding ring. Then this can be slid over the 3/16 stainless and with slow even pressure, possibly sand down any high spots on the plate ebonite spacer. The reason I am thinking oversized is that I don't want a tight fit to the ring so that as I sand it, heat builds up on the stainless tenon and glue joint. I hope that makes sense.
I am thinking of making these in 400, 600, and possibly 800 grit as well.
Does this seem like something that would work? I feel like it would only work if the issue is coming from the plate ebonite side of the junction. If the issue is coming from the stem side, I would most likely have to reverse the process, and make a bunch of sanding tools that are faced perfectly square, have sandpaper glued onto them, and have stainless tenons glued into them.
I would love to know your thoughts on this.
While the stem material was still chucked into the wood lathe, I have tried drilling the mortise in the stem just a hair deeper than needed, and that did not work. I tried re-facing the stem with multiple different Forstner bits, and that did not work either. I also made sure to countersink the stem thinking that might be the problem. That also did not work.
My thought is that either the face of my bamboo was not perfectly square before i glued on the plate ebonite, or that the plate ebonite is not milled perfectly square, or that somehow in drilling, the Forstner bit is not cutting the ebonite perfectly square.
Here are some things I am thinking of trying to remedy this, and I would appreciate any advice as to whether or not you think this might work.
Definitely re-sharpening my Forstner bits.
I am thinking of making a sanding ring by taking a scrap piece of ebonite, facing it, drilling out a mortise all the way through that is just slightly oversized to the normal 3/16, and then gluing a piece of sandpaper that has been hole punched at 3/16 on the face of the sanding ring. Then this can be slid over the 3/16 stainless and with slow even pressure, possibly sand down any high spots on the plate ebonite spacer. The reason I am thinking oversized is that I don't want a tight fit to the ring so that as I sand it, heat builds up on the stainless tenon and glue joint. I hope that makes sense.
I am thinking of making these in 400, 600, and possibly 800 grit as well.
Does this seem like something that would work? I feel like it would only work if the issue is coming from the plate ebonite side of the junction. If the issue is coming from the stem side, I would most likely have to reverse the process, and make a bunch of sanding tools that are faced perfectly square, have sandpaper glued onto them, and have stainless tenons glued into them.
I would love to know your thoughts on this.