Stain coming off Stummel?
Hi All,
Another stain question! I received an email from a customer who had recently purchased a pipe from me. When he smoked the pipe for the first time, his hand was stained orange! I remember reading a thread about a similar problem, but can't locate it now.
This is the pipe in question:
I used my normal procedure to finish the pipe: sand to 800 grit, stain, polish with tripoli and white diamond, apply carnuba and buff. The stain I used was Light Brown I bought from Andrea at Pipmaker's Emporium. The bottle is unmarked but I think its Lincoln Leather Dye. I've used it before without the stain coming off the stummel in the smoker's hand! Not something I'd like to see happen again! Anybody have any thoughts on this?
David
I think if you PM Trever that he has the answer. I'm 90% positive he was the one who responded to this problem earlier. I think there was someone who suggested that it was all of a certain brand that it happened to and that it made them cheap or something (sorry to the person if I am mis-remembering). I believe Trever posted saying that it was very common among Danish pipes. Can't quite remember if he offered up an explanation/solution tho.
Hi David,
I think it may be a problem of fixing the stain!? Here's a description of my finish-technology:
Sanding down to 400 grit, aply stain 1 - 3 times, where I wipe of the last coat before the stain is dry to take away all stain that didn't got into the briar. After Staining and drying I apply a sealer of nitrocellulose basis to capture the fine hairs of the wood, let it dry (about 20 minuites) and carefully sand down again with 400 grit - this will give you a very smooth surface! After that the stain is fixed, but I use shellak or Danish Oil to seal the surface again and after drying of this I do the polishing pocedure: Only tripoly for the stem, white diamond for stem and stummel and at last carnaubawax. For the carnaubawax I use a heatgun to make the wax a little bit softer, before I apply it to the polish-wheel...
The result looks something like this (the example is unstained):
Greetings from Germany,
Heinz_D
Heinz_D
- KurtHuhn
- Site Admin
- Posts: 5326
- Joined: Thu Nov 23, 2006 8:00 pm
- Location: United States/Rhode Island
If the stain has any red or orange pigments in it, you may find that you can have problems with the stain coming off. These stains, for reasons I can't recall, are especially susceptible to coming off.
The fix for this? Well, you have to venture into territory that can get you badmouthed on USENET, but if the stain is coming off on your customers' hands, what have you got to lose? Shellac may be your answer.
Also, you may try staining the pipe *before* sanding to 800 grit. At 800 grit, the pores of the wood are mostly too small to accept the stain, and a lot of the stain will sit on the surface just waiting to be given a small amount of moisture in order to release itself from the wood. I typically apply the last coat of stain at 360, and then sand with 500.
- LexKY_Pipe
- Posts: 875
- Joined: Thu Nov 23, 2006 8:00 pm
- Location: Lexington, Kentucky USA
When I was in Denmark I bought a pipe from Kai Nielsen. Shortly after breaking it in, I noticed some orange stain on my hands. Moisture obviously causing the stain to come off. I think the orange/reds as Kurt suggested are more susceptible.
I agree with Kurt that a light touch of shellac. Shellac is a natural, organic product and lightly applied before buffing and waxing, it will set the stain. The operative word here is "lightly".
Another solution I didn't remembered while my posting above: The pigments of any red or orange stains are difficult to get into briar! Try to reduce the (alcohol-)stain to the half and backfill to the origin amount with acetone. That will help to let the pigments get deeper into the briar.
Greetings from Germany,
Heinz_D
Heinz_D
Curious! Care to elaborate? I tried this technique today, or similar. I stained after 400 grit, sanded with 600 grit, and took off every bit of stain except in the grain. Stained again and sanded with 800 grit, same thing!KurtHuhn wrote:Also, you may try staining the pipe *before* sanding to 800 grit. At 800 grit, the pores of the wood are mostly too small to accept the stain, and a lot of the stain will sit on the surface just waiting to be given a small amount of moisture in order to release itself from the wood. I typically apply the last coat of stain at 360, and then sand with 500.
I'll have to revisit using shellac again. I did a lot of experimenting with it last year but never achieved good results. The stummel always had places where the shellac would soak in to the briar and places that would be shiny. When waxing, I'd get ridges where the shiny spots were. Could never get what I felt was a good even coat without using full strength and practially soaking the stummel in it. Guess its back to the drawing board.
David
- KurtHuhn
- Site Admin
- Posts: 5326
- Joined: Thu Nov 23, 2006 8:00 pm
- Location: United States/Rhode Island
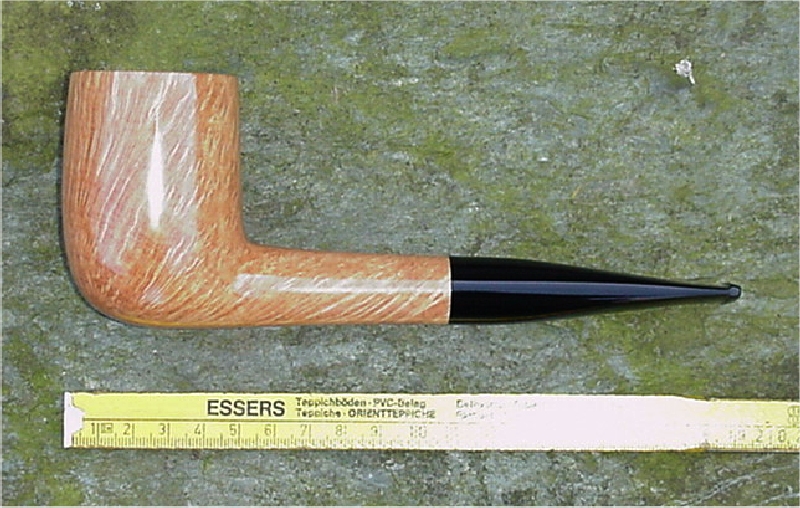
My normal procedure:bvartist wrote:Curious! Care to elaborate? I tried this technique today, or similar. I stained after 400 grit, sanded with 600 grit, and took off every bit of stain except in the grain. Stained again and sanded with 800 grit, same thing!KurtHuhn wrote:Also, you may try staining the pipe *before* sanding to 800 grit. At 800 grit, the pores of the wood are mostly too small to accept the stain, and a lot of the stain will sit on the surface just waiting to be given a small amount of moisture in order to release itself from the wood. I typically apply the last coat of stain at 360, and then sand with 500.
- fine tune the shape of the stummel with 220 grit
- apply first coat of stain and let it soak in and completely dry
- sand with 360
- apply another coat of stain and let it completely dry
- sand with 500
- apply top coat of stain
- do final sanding (ancient chinese secret)
- finish the pipe
Applying stain early in the process allows it to really soak into the wood and get inside all the areas that it can't penetrate when you've sanded it as high as 800 grit. This provides some very striking grain contrast.
Also, at lower grits, there is far more surface area, and more opportunity for stain to get into the wood that simply isn't there once you've sanded off all the ridges and bumps and made the pipe perfectly smooth. The sanding process removes all those surface imperfections where the pores of the wood are. Also, sanding at high grit compacts the surface of the wood, closing up pores that are there to begin with. The stain just can't soak in as readily.
You can demonstrate this to yourself if you stain a piece of wood after 200 grit sanding and after 800 grit. The wood stained after 200 grit can even be sanded again with 200 grit and still retain a lot of grain contrast and color. Not so much with the one sanded to 800.
Shellac on a pipe cannot be treated as if you were finishing a piece of furniture. The coating is almost non-existent. You need to cut your shellac way down, I forget the actual ratio that Todd Johnson mentioned, but I just make it about 1/3 strength using garnet shellac flakes I get at woodcraft (I like the warmth of the garnet color). It should be very thin. Then:I'll have to revisit using shellac again. I did a lot of experimenting with it last year but never achieved good results. The stummel always had places where the shellac would soak in to the briar and places that would be shiny. When waxing, I'd get ridges where the shiny spots were. Could never get what I felt was a good even coat without using full strength and practially soaking the stummel in it. Guess its back to the drawing board.
- using a pipe cleaner, soak your final coat of stain into the pipe, don't be afaid to use a decent amount
- let it dry
- using another pipe cleaner apply a liberal amount of shellac to the pipe
- *immediately* wipe it off with a lint-free rag The entire process from application to wiping off should take about 10 seconds.
- this will remove some of the final coat of stain - this is okay, that's why you slap on a whole bunch of that final coat.
- Buff and wax as normal
Note that you are not trying to get a hard coating of shellac. The shellac is simply a "spit coat" used to set the stain. The shellac, used like this, won't even make the pipe shiny - that's the job of buffing compounds and carnuba. And, it doesn't "seal the wood an not allow it to breathe" as some folks like to claim - it's not like you've applied a thick coat of spar finish or something.
The benfits are that your pipes will stay shinier longer, the stain will be set, and the contrast provided by setting the stain prior to buffing is far superior to what you'll get without.
And now, I await the inevitable flames.
Yikes! Now I see a whole bunch of things I need to work on!
I refine my shapes with 400 grit, guess I'm a little heavy handed, 220 removes a lot of wood and I'm not accurate enough with it.
Usually by the time I get the shellac on the pipe, its already dry. I tried wiping it off before but there wasn't anything to wipe! Got to find a way to get it on quicker!
The last attempt I made with shellac was diluting a 1lb cut with an additional 3 parts alcohol. (one part prepared shellac-3 parts alcohol) but it dried so fast I couldn't keep from getting overlap that caused spots of the stummel to be shiny.
Oh well, briar is cheap! Practice is fun
- KurtHuhn
- Site Admin
- Posts: 5326
- Joined: Thu Nov 23, 2006 8:00 pm
- Location: United States/Rhode Island
Hmm. Are you using a cushioned abrasive, sandpaper strips, french wheels, or...?bvartist wrote:I refine my shapes with 400 grit, guess I'm a little heavy handed, 220 removes a lot of wood and I'm not accurate enough with it.
Keeping in mind that I shape primarily on a belt grinder with a 120 grit belt moving at 5000 SFPM, I guess I've developed a light hand. You want to talk about rapid material removal!
Oh well, briar is cheap! Practice is fun
I used to think I had fun hacking on electronics and designing networks and data infrastructure. Woodworking is *far* more fun. And, if you screw it up, it's not a big deal to trash the project and start over.
Kurt, I use cushioned 3" disks for the majority of sanding. 800-1800 rpm on my lathe and firm to soft backing pads depending on the grit I'm using. The disks I have may be a little agressive, all sandpaper not being created equal! And I've been thinking about trying disks from other manufacturers. The ones I use now, even 600 and 800 grit will remove wood, not just refine the surface if I'm not very careful or use a worn disk.KurtHuhn wrote: Hmm. Are you using a cushioned abrasive, sandpaper strips, french wheels, or...?
Keeping in mind that I shape primarily on a belt grinder with a 120 grit belt moving at 5000 SFPM, I guess I've developed a light hand. You want to talk about rapid material removal!
Thanks for taking the time to write out your sanding/staining procedure! Gives me a couple ideas I can try with my setup to possibly make things better!
David
- KurtHuhn
- Site Admin
- Posts: 5326
- Joined: Thu Nov 23, 2006 8:00 pm
- Location: United States/Rhode Island
David,
Try googling Abralon discs. You can get them at woodturnerscatlog.com, and more and more places are carrying them. They are, as my nephew might have said, "the shiznit". The 500 grit Abralon pad is far less aggressive than sandpaper of the same grit, and is capable of producing a final finish on wood. It doesn't remove a lot of briar, and simply refines the finish. You can get higher grits as well, which I use when sanding stems.
- KurtHuhn
- Site Admin
- Posts: 5326
- Joined: Thu Nov 23, 2006 8:00 pm
- Location: United States/Rhode Island
The abralons last a long time. The lower grit not as long as the higher grit, but they still far outlast paper discs. The only paper discs I use anymore are for cleaning up after rough shaping. And even those are single use items.
I got scolded last week for coming home from Woodcraft with a new 1/4" fingernail gouge. But it was worth it.
Yeah, that's why all your pipes smoke hot!! You've sealed the surface and the briar can't breath! REAL pipemakers don't ever use anything but teh wax, and they don't stain either because tht's jsut an0ther way for unscrupulous pipemakers to hide flaws!!KurtHuhn wrote: And now, I await the inevitable flames.
There, how's that?
(Note for the humor-impaired - That was me being silly, not me being serious)
I can already tell that I'm going to enjoy working with Zapon very much. For those who are interested in such stuff, I just wrote about this, and more trivia on the subject of finishes, in my pipe blog in this article:
http://www.talbertpipes.com/2007/02/toys-in-mail.html
Happy Smoking,
Trever Talbert
www.talbertpipes.com
My Pipe Blog:
https://talbertpipes.com/category/pipeblog/
My Lizards & Pipes Web Comic:
https://talbertpipes.com/category/lizards/
Trever Talbert
www.talbertpipes.com
My Pipe Blog:
https://talbertpipes.com/category/pipeblog/
My Lizards & Pipes Web Comic:
https://talbertpipes.com/category/lizards/
Ha! Now if THAT were the case then my word would be, "Send me 65% of the price of all pipes sold"Nick wrote:If Trever says thats how to do it, then by god, that's how I'll do it! Trever's word is law among the pipe makers of the world. At least the good ones anyway.
Happy Smoking,
Trever Talbert
www.talbertpipes.com
My Pipe Blog:
https://talbertpipes.com/category/pipeblog/
My Lizards & Pipes Web Comic:
https://talbertpipes.com/category/lizards/
Trever Talbert
www.talbertpipes.com
My Pipe Blog:
https://talbertpipes.com/category/pipeblog/
My Lizards & Pipes Web Comic:
https://talbertpipes.com/category/lizards/
WOW! Even as master of the world you'd only take 65%?? Your a true gentleman!TreverT wrote:Ha! Now if THAT were the case then my word would be, "Send me 65% of the price of all pipes sold"Nick wrote:If Trever says thats how to do it, then by god, that's how I'll do it! Trever's word is law among the pipe makers of the world. At least the good ones anyway.