Contrast staining

Sanding, rusticating, sandblasting, buffing, etc. All here.
Post Reply
kola
Posts: 74
Joined: Mon Feb 16, 2009 11:11 pm

Contrast staining

Post by kola »

My first pipe is ready for color. I have read many of the posts here..great stuff and thank you.
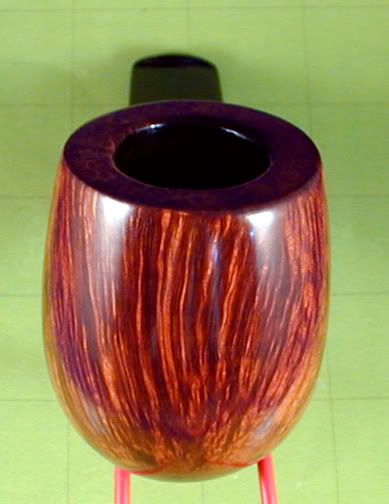
I want to create a really good contrast on this pipe. I'd like to have some really dark lines and then a bright orangey tone. I don't want a pumpkin color but just a nice bright orange and have the dark brown/blackish to contrast it. I have read where you apply one color, let it dry and sand it out and then apply a second color but I am not very clear to the specifics involved.
How is that achieved?
Does it matter which color is applied first?
Is any heat used in the drying process?
How can I achieve a nice contrast?
I am open to all comments and even maybe a change of colors too.
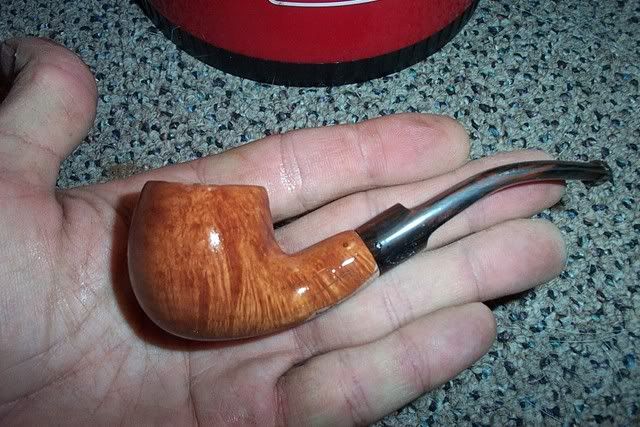
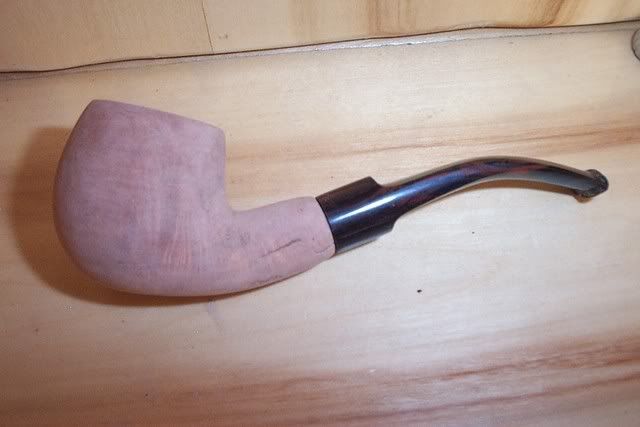
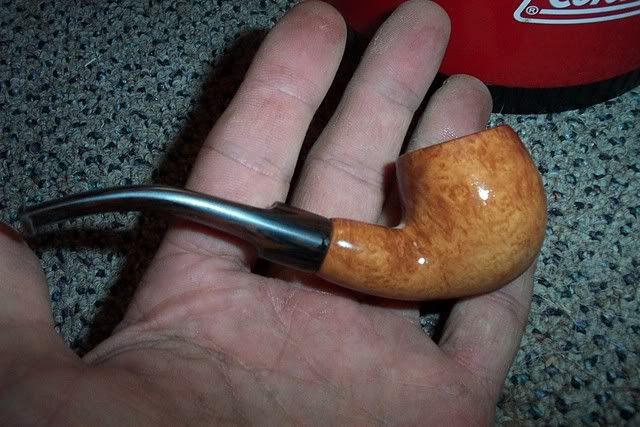
Anyway heres my pipe. Someone said it looked like a "pregnant Peterson." LOL!
(a couple of the pics I dampened down the briar just to get a better look at the grain)
Image
Image
Image
User avatar
kkendall
Posts: 472
Joined: Thu Mar 01, 2007 1:15 pm
Location: Phoenix, AZ
Contact:

Post by kkendall »

The colors that might give you what you want is Dark Brown, and Light Tan (the light tan is kind of orangy).

You apply the dark brown first. Spray the pipe with alcohol (I use denatured) and wipe the pipe. This will even out the color so it isn't blotchy. When dry, repeat the process, dark brown, spray it, wipe it down.

If you don't have a buffing wheel, you can use "0000" steel wool and elbow grease or a really fine grit paper. The hardest parts of the wood won't take the stain all that well, so you will be left with the dark brown streaks of color on the straight grain and the birds eye areas will pop.

Then follow that with the light tan... same process as above. You will be left with something like this:

Image

Then wax it.
kola
Posts: 74
Joined: Mon Feb 16, 2009 11:11 pm

Post by kola »

Thanks Kim!

kola
User avatar
Frank
Posts: 1341
Joined: Thu Nov 23, 2006 8:00 pm
Location: Southern California

Post by Frank »

A stain that is slightly more orange would be British Tan.

1) Sand to 220
2) Stain Dark Brown
3) Sand 320/400
4) Stain Dark Brown
5) Sand 500/600
6) Stain Light Tan or British Tan
7) Rub with 0000 Steel Wool or buff with Brown Trip
8 ) Final buff with White Diamond or (my preference) Menzerna
9) Carnauba wax

Image
Regards,
Frank.
------------------
Grouch Happens!
People usually get the gods they deserve - Terry Pratchett
User avatar
KurtHuhn
Site Admin
Posts: 5326
Joined: Thu Nov 23, 2006 8:00 pm
Location: United States/Rhode Island

Post by KurtHuhn »

Or, using a process similar to the one Frank described, dispense with the topstain and buff after sanding 500/600:
Image
Kurt Huhn
AKA: Oversized Ostrogoth
artisan@k-huhn.com
kola
Posts: 74
Joined: Mon Feb 16, 2009 11:11 pm

Post by kola »

Very nice you guys! TY

My pipe does not have the best grain or flow to it so I do not expect too much. I would like to finish it though, smoke it and move on to another one.

Is Feinbein (sp?) alcohol based stains what everyone uses?

Kola
User avatar
bscofield
Posts: 1641
Joined: Thu Nov 23, 2006 8:00 pm
Location: United States/Illinois
Contact:

Post by bscofield »

Fiebing's? A lot of people user their dye, yes. I have a leather goods store not too far from where I live so I have tapped into their house brand (although for all we know they could be the same thing- like 1Q :D ).
User avatar
Frank
Posts: 1341
Joined: Thu Nov 23, 2006 8:00 pm
Location: Southern California

Post by Frank »

kola wrote:Is Feinbein (sp?) alcohol based stains what everyone uses?
The stain colours given are all Fiebings.

If you're going to refinish the pipe you have illustrated above, I would recommend that you try to improve the shank/stem transition, i.e. the shank should flow into the stem. As it is, it really has no transition at all.
Regards,
Frank.
------------------
Grouch Happens!
People usually get the gods they deserve - Terry Pratchett
kola
Posts: 74
Joined: Mon Feb 16, 2009 11:11 pm

Post by kola »

Yes Frank, I agree that its downright ugly at the shank/stem area. I cracked it re-drilling the draft hole and I am either going to fit it with a band or just epoxy it together. That is why I stopped shaping in that area.
I am just wanting to finish the thing and I will probally just patch it with epoxy and some briardust. Thanks !

Kola
User avatar
bscofield
Posts: 1641
Joined: Thu Nov 23, 2006 8:00 pm
Location: United States/Illinois
Contact:

Post by bscofield »

I was looking at the pipe, and while you have not asked for critique (yet) I'd like to say that you have the room to fix the rounded shoulders on the shank face without losing your shape...
User avatar
Frank
Posts: 1341
Joined: Thu Nov 23, 2006 8:00 pm
Location: Southern California

Post by Frank »

kola wrote:I am just wanting to finish the thing and I will probally just patch it with epoxy and some briardust. Thanks !
:lol: I understand what you're saying. Enough with this first pipe, I want to try another. Screw ups are par for the course and all add to the learning process. For a first pipe it's not at all shabby overall - carry on.
Regards,
Frank.
------------------
Grouch Happens!
People usually get the gods they deserve - Terry Pratchett
kola
Posts: 74
Joined: Mon Feb 16, 2009 11:11 pm

Post by kola »

Yes Ben, the shank is pretty thick and I can trim it down some. Thanks.

Is there any concerns if I use epoxy to glue the shank where its cracked? Kim Kendall suggested using AP glue and briar dust to fill it, but will it absorb the stain uniformally?

Thanks! Kola
User avatar
kkendall
Posts: 472
Joined: Thu Mar 01, 2007 1:15 pm
Location: Phoenix, AZ
Contact:

Post by kkendall »

"CA" (Cyanoacrylate) ... superglue.... and briar dust
it will take stain!

-K
kola
Posts: 74
Joined: Mon Feb 16, 2009 11:11 pm

Post by kola »

Sorry, Kim, yes you told me CA..and I thought it was AP. I wasn't even close. DOH!

Kola
User avatar
ToddJohnson
Posts: 1366
Joined: Thu Nov 23, 2006 8:00 pm
Location: Nashville, TN
Contact:

Post by ToddJohnson »

kkendall wrote:"CA" (Cyanoacrylate) ... superglue.... and briar dust
it will take stain!

-K
Hey Guys,

From my experience, superglue and sanding dust will not take stain. It basically always ends up black. Perhaps others have had varying results, but generally, if you're filling a small sandspot, count on it being black and not the color of the understain you intend to use . . . unless that understain is black :D

Todd
User avatar
Sasquatch
Posts: 5147
Joined: Tue Jan 13, 2009 1:46 am

Post by Sasquatch »

Agree with TJ here... I super glue my stummels when I have them on the lathe, and that part will NOT take any stain. It gets sanded off anyhow, so I'm not bothered, but if you are making a stainable patch, you might be better off with cabinet makers putties or a burn-in fill stick.
Post Reply