Contrast Stain

Contrast Stain
Anybody care to share any thoughts on getting a good contrast stain? I'm envious of the really sharp Danish style -- Eltang, et al. I have been operating on the assumption that you must first get a really good penetration on the black coat, and have tried using water instead of alcohol as a carrier. I can't tell an appreciable difference. Further, it stands to reason that for real contrast you should use a color stain that washes out the black as little as possible. Following alcohol/black with water/color, or vice versa, doesn't achieve the effect. There are lots of things to try, but I thought I'd just throw this out, see what others have to share. If it's proprietary information, I certainly understand.
-
RocheleauPipes

- Posts: 66
- Joined: Thu Nov 23, 2006 8:00 pm
- Location: Kelowna BC Canada
- Contact:
Hi Jack,
You have to apply the dark stain; be it black or just any dark color you want as the base, then sand the whole thing back with either 400 then 600, or just 600, then apply the highlight stain. By doing that, you'll sand the dark stain off the harder grain lines, where the stain hasn't penetrated fully, and leave it in the softer grain lines, to a reduced degree. The thing to watch for is ensuring you have sanded to perfection prior to applying the dark stain. If you haven't, you will leave dark stain lines after sanding back, showing where you have missed. Another method is to dark stain then alcohol wash the dark stain back, then apply the highlight stain, but that doesn't achieve the same result. There are likely tricks to this I haven't discovered yet, but that will be a place to begin.
Have fun,
John
That's pretty much what I do as a matter of course -- apply black stain first, both to enhance the grain contrast and to show up any sanding scratches, then follow with sanding and tint. It's not the same as a real contrast stain, though, where the black parts stay REALLY black. Sanding removes the black a little too evenly, and the subsequent coats of stain even things out a little too much. Looks good, just not a contrast stain. If I were doing any other type of wood, I'd make the black an oil-based stain, sand, then apply a water-based tint. I'd leery of doing that with a pipe, for fear of affecting the taste.RocheleauPipes wrote:Hi Jack,
You have to apply the dark stain; be it black or just any dark color you want as the base, then sand the whole thing back with either 400 then 600, or just 600, then apply the highlight stain. By doing that, you'll sand the dark stain off the harder grain lines, where the stain hasn't penetrated fully, and leave it in the softer grain lines, to a reduced degree.
-
RocheleauPipes
- Posts: 66
- Joined: Thu Nov 23, 2006 8:00 pm
- Location: Kelowna BC Canada
- Contact:
Further notes
The other thing I find about contrast staining that deserves mention, before someone goes and tries it on a beautiful peice of briar, is: It will bring out the slightest nuance in the grain. The pattern you may want brought out might be the main grain lines which is what your eye picks up when viewed at a normal distance. You see a great pattern and striking grain, but the contrast stain might bring out all the little lines that may confuse that wonderful pattern it had when just sanded. Contrast staining can totally ruin the effect of the grain pattern if applied to the wrong pipe. Try it on some slices of briar a few times to see what I mean.
I've gotten a couple good deep contrast stains using the method I posted above. The way I managed it was to use no courser than 600 grit to sand back, and to ensure you don't have to sand too far, the original sanding must be perfectly uniform. There are ways to get much more dramatic effects that I have solid ideas on, but I haven't tested them out yet, so I won't say right now. I expect they will give me that total contrast you see in Eltangs work for instance. More later I hope. I do like the staining process.
John
One technique that I have found helps the understaining process is to let the briar sit overnight in a warm enviroment before staining. A small box, heated by a 25 watt light bulb will maintain a temperature between 120 & 140 degrees F.
Using a leather dye as the understain, and an alcohol based aniline dye as the top coat seems to reduce the bleeding to a notiable extent, and results in a higher degree of contrast.
Mike
Using a leather dye as the understain, and an alcohol based aniline dye as the top coat seems to reduce the bleeding to a notiable extent, and results in a higher degree of contrast.
Mike
I've heard leather dye mentioned before as an understain, also leather stain. A quick check of Tandy shows both dye and stain. Is there a more specific recommendation for what to use?pipemaker wrote: Using a leather dye as the understain, and an alcohol based aniline dye as the top coat seems to reduce the bleeding to a notiable extent, and results in a higher degree of contrast.
Mike
Thanks,
-
RocheleauPipes
- Posts: 66
- Joined: Thu Nov 23, 2006 8:00 pm
- Location: Kelowna BC Canada
- Contact:
In my humble opinion Alcohol based aniline dyes are the only good way to go. Oil based stains will darken the wood more because of the affect of the oil or resin in them. That limits the control on color. I use dyes from Mohawk Industries. They have a web site. They sell dye powder in 8 oz jars. I paid $35 CAD for each jar. I use the three primaries only and mix all colors from them. My total investment then was $105 CAD and that will be enough for a lifetime of staining in any color you can imagine.. Just mix a teaspoon or so with 6 or so ounces of alcohol as a starter. Much nicer cleaner colors than you'll get from pimo, and infintely less costly in the long run.
John
John
Jack,
I use Fiebings leather dye for the undercoat. Although it is alcohol based, it is much less prone to bleeding than other dyes I have tried. The dye is highly concentrated and the colors are crisp and clean. Their USMC black is very pure without the red or blue tints often found in black stain.
Mike
I use Fiebings leather dye for the undercoat. Although it is alcohol based, it is much less prone to bleeding than other dyes I have tried. The dye is highly concentrated and the colors are crisp and clean. Their USMC black is very pure without the red or blue tints often found in black stain.
Mike

-
RocheleauPipes
- Posts: 66
- Joined: Thu Nov 23, 2006 8:00 pm
- Location: Kelowna BC Canada
- Contact:
"Out of curiosity, would Swedish Teak oil work? I know it's a stain, but I'm not sure if it's oil or water based. I like it's effect on all wood, but it may be toxic...."
Hi AAdomeit,
Teak oil is oil based; it usually contains tung oil, and other oils, and mineral spirits as a carrier. As far as toxicity goes, most of these oils are non-toxic when dry. The carriers--in this case mineral spirits--are the toxic compponent. The thing is, mineral spirits evaporates 100%, so the end result is non-toxic. If you like using it, use it. The toxicity issue is overblown or little understood. Tung oil for instance is often sold as a food and drug approved oil for butcher blocks,m even though the carrier is toxic. The manufacturers have to pay for testing to get an approval number. The cost of testing is why you don't see that approval on most products like that. The downside of swedish teak oil, or any oil-based stain, is the slow dry time, and the lack of color control that can be acheived with alcohol-based aniline dyes.
Been in the tech end of the paint industry for over 30 years, so if you have any concerns, just ask.
John
Excellent!
Actually, the slow dry time doesn't affect me much - it seems to dry completely in about an hour up here. The atmosphere here is exceptionally dry, so the moisture is sucked right out. Also, I tend to use about 3-5 coats when staining (made a really nice ash and maple book case that way! All hand carved....sold it for about $1800 US)
Thanks John!!
-
RocheleauPipes
- Posts: 66
- Joined: Thu Nov 23, 2006 8:00 pm
- Location: Kelowna BC Canada
- Contact:
The oils you use are excellent for bringing out the traditional beauty of such woods, and for those applications.
With pipes, one has to remember that all pipes end up brown after time spent smoking. I try to stain so that after smoking, the briar still exhibits contrasts and color variations. I am of the opinion that alcohol based dyes contribute less to the brown tendency than do oil based stains from smoke. When you apply an oil stain to a pipe, two solids are left in the briar: the oil, that has now changed into another chemical compound from oxidation, and the pigment. With aniline dyes disolved in alcohol, the only solid left is the dye. After smoking, an oiled pipe will darken much more than a pipe treated with alcohol dyes, because of the interaction of the heat and smoke with the converted oil.
It all depends on what you want to achieve. Also, all the above is just my opinion based on my own theory and experimentation. There are likely lots of instances where an oil stain would be just the ticket for a pipe.
That bookcase sounds great. Do you have any pictures of it that you can post? I would love to see it.
John
Unfortunately, Tyler, I did not have a digital camera to take photos of, and I'd spent so much money on the wood that I couldn't afford film! This sounds like a cop out, but it's the truth. Fortunately, I was still living with my parents, so I didn't die!
Essentially, it was laminated ash shelves and box with maple trim. Some of the shelves were engraved with a leaf pattern (carved by hand. Took ages!) and was supported at the corners with biscuit joins. I attempted tongue in groove at one point, but I fouled up. Had to re-do it. The person who bought it from me moved to Sacremento two years ago, and I've lost contact. Oh well.
I could do some drawings of it, if you want. I have a friend with a scanner... If you like it, we could arrange a pipe-case for you!

I, for one, am not done with this topic  . John, any info you can post about the methods you had not tested? I just drool whenever I wander over to dansihpipemakers.com and look at eltang's pipes... they are absolutely amazing! I might just have to save up $10k and have him sell me the secret
So, anyone make any advancements?
For those of you who need more desire to learn this:
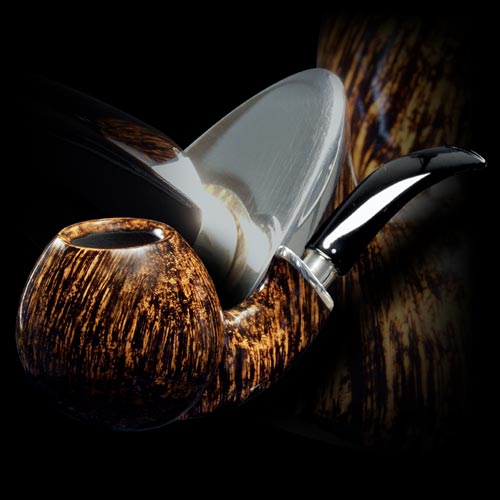
That oughta do it...
So, anyone make any advancements?
For those of you who need more desire to learn this:
That oughta do it...