Pipe #1

Want to show you work to the world? Want a place to post photos of your work and solicit the opinions of those that have gone before you? Post your work here.
Post Reply
nboaldin
Posts: 9
Joined: Thu Dec 20, 2012 10:51 pm

Pipe #1

Post by nboaldin »

Hello all,

This is my first post. I am humbled and thankful to be able to join this forum. You gentlemen... and possibly ladies, are amazing craftsmen and artist from what I have seen, and I would love to glean whatever knowledge and skills are being offered on this forum.

On to business.

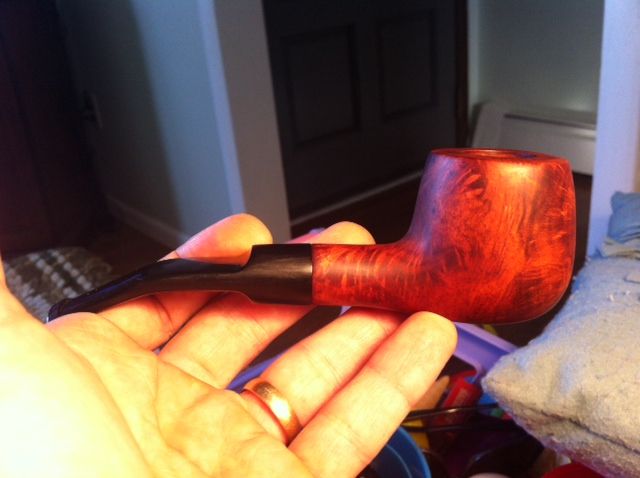
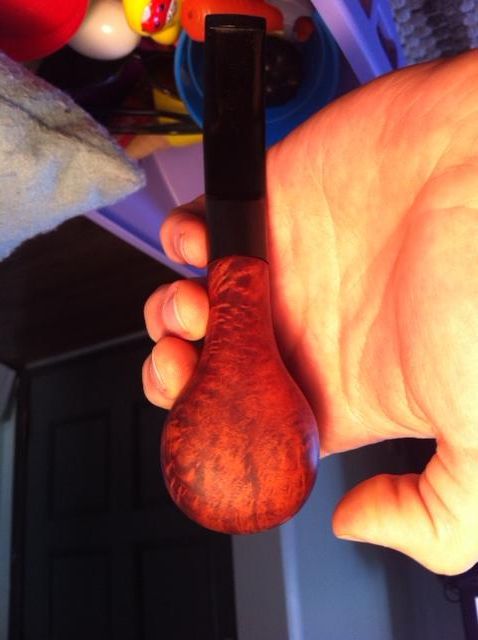
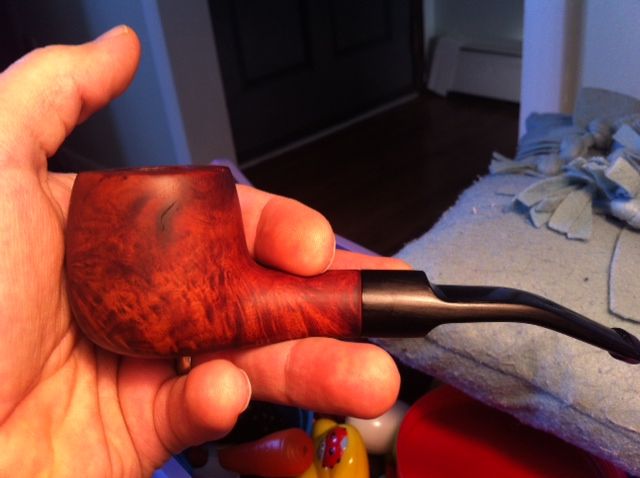
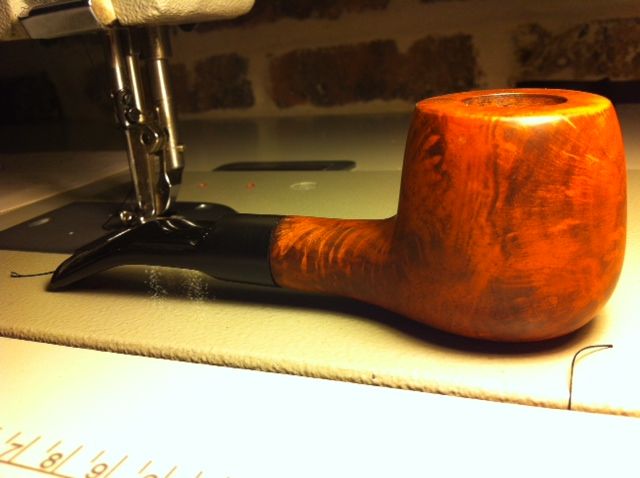
Below are pics of my first pipe. I believe it was a straight eubachon blank, because the grain is super weird. I shaped it with a Dremel tool (mostly the cylindrical sanding bands). Then I sanded 220, 320, 400, 600, 1000. I contrast dyed with leather alcohol dye. I buffed with brown tripoli and something called white rouge from Home Depot. I am waiting on shipments of white diamond and carnauba, so I haven't buffed with either of these yet. I attempted to bend the stem with a lighter simply for practice. The finish is the last of three tries, because I would research and find techniques that I could do better, then refinish. I am disappointed that it doesn't look like Eltang's, but hey... it's my first pipe.

I have a few questions, and welcome any critique.

Questions:

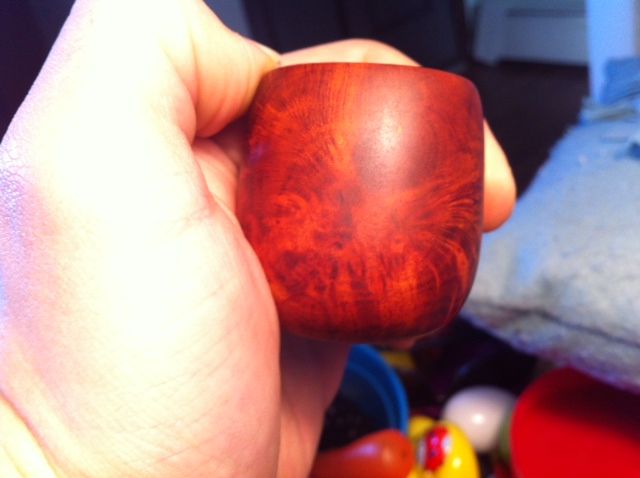
I've heard that the pipe should be pretty darn shiny before carnauba. If so, how the heck do you do that because mine looks smooth but pretty matte?

Also, there are are what I call 'bands' that run perpendicular through the dark grain that make the finish look wavy and not crisp and defined. What are these or what did I mess up?

I sanded and buffed parts of the stem when I was sanding the shank. Should it buff out, because it looks matte in places, now?

Based on this work, what would you guys recommend for my second pipe in order to upgrade my craftsmanship?

And some pics:


Image

Image

Image

Image

Image

Thanks to all!

-Nathan
User avatar
Ocelot55
Posts: 1639
Joined: Thu Nov 10, 2011 12:31 pm
Location: Columbus, OH
Contact:

Re: Pipe #1

Post by Ocelot55 »

Nathan,

Congrats on your first pipe. You have no clue what addiction you may have uncovered! :twisted:

Now on to the pipe. I won't be too harsh. It actually looks pretty good for a first pipe. First, why did you bend the stem? It makes no sense with the composition IMHO. Second, there is still a lot of meat you can remove from the bowl shank junction to define the shape. Third, there is a slight divot at the stem shank junction. Make sure to keep the pipe together as you sand it. Don't worry about sanding the stem, just shape it like you would the briar and sand all the scratches out of it. Lastly, the bottom line of the pipe isn't straight. If you can remove more material from the bottom of the bowl it would improve the look.

The 'bands' you might be seeing could actually be the growth rings on the pipe.

I wouldn't worry too much about getting a high gloss finish yet. The carnauba makes a huge difference. You'll see when you get it in.

On your next one I recommend you try to copy a classic pipe shape. Perhaps one you have in your own collection so you can have it on hand as you shape.

Welcome and good job. Now go make about 10 more!
Cory
Posts: 189
Joined: Tue May 15, 2012 11:44 pm
Location: Auburn, AL

Re: Pipe #1

Post by Cory »

Ocelot pretty much nailed it.

It looks like there are still some scratches in the stem and on the bowl - I would spend more time sanding. I find that looking at the pipe under a bright light (a direct source, not overhead lighting - aka a lamp) helps show you the scratches.

Overall, the stummel needs to have A LOT of meat removed - it is a pretty common mistake made in first pipes. This is especially true around the shank/bowl junction. It should be a sharp junction, not a smooth curve.

The stem appears to be at a different angle than the shank - how are you facing the stummel and drilling your mortise?

ALWAYS sand the pipe assembled. It will get rid of that unsightly gap/rounded part of your stem/shank joint.

Bend is far to severe - nine times out of ten, a bend looks better as a smooth curve, rather than a sharp bend. Also, I agree with Ocelot - no need for a bend on this shape.

Spend more time sanding and you will get a better finish - but the white diamond and carnauba will help.

Try to avoid the 'dip' along the bottom line of the bowl. There should be a seamless (none, really) transition between the bottom of the shank and the bottom of the bowl - most of the time.

Sand the inside of your chamber - just run over it with some 120 or 150. Be careful to not scratch the top of the bowl though.

Best way to learn is keep making them. DO NOT try to get funky. Start with the classics. Go make a billiard, post it, see what you did wrong, then make another one. This will help you develop a 'sense' for pipe shapes and what a good pipe looks like. There are some key elements that you can read in a book, but you will develop a 'feel' that is much more important. I know it is hard to stick to the boring old classic shapes, but reign in your creativity for now. Focus on drilling, stem/shank joints, shank/bowl junctions, general shaping, etc. Once you begin to master that, you can go crazy.

But, what the hell do I know?
The way to make people want to smoke your pipes is to develop a reputation for excellence in your work. This takes a lot of hard work and several years to accomplish, and there are no short cuts. You just have to keep at it. - Rad Davis
nboaldin
Posts: 9
Joined: Thu Dec 20, 2012 10:51 pm

Re: Pipe #1

Post by nboaldin »

Thanks for the critique, guys. I want to start another ASAP! Maybe I'll just give this one a once over and try to fix my mistakes. I can see how making pipes can be so addicting. I have been obsessed for the past 3 weeks since I got my kit.
...how are you facing the stummel and drilling your mortise?
Sorry, forgot to mention it was a kit. All I did was shape, sand and finish.

After I write this I will promptly research classic pipe shape specs. If any of you know an excellent source for this information it would be much appreciated.

Once again, thanks for your help and patience, Cory and Ocelot!
Cory
Posts: 189
Joined: Tue May 15, 2012 11:44 pm
Location: Auburn, AL

Re: Pipe #1

Post by Cory »

I wouldn't try to fix ALL of the mistakes. Leave the shape close to how it is - use it as a practice for finishing is what I would do. Go back and sand it more.

The reason for that is, since you are so unexperienced - you can take it too far if you don't have a guideline...which you don't. This pipe already lacks definition and making it into a classic shape (something that you can have a definite goal to shape like) would probably cause more harm then good. Start on a fresh block - pick a classic shape and go for it. No need to get frustrated. This pipe will serve as a good reminder of where you started.

aspipes.com used to have a great reference for pipe shapes, but I can't get the link I have to work anymore.

http://www.cupojoes.com/dunhill_shape_chart.html

Hopefully someone else will chime in with a better reference for that.

I recommend starting drilling as soon as you can. If you have a drill press and a drill press vise, you can do it. There are VERY in depth walkthroughs on drilling on the forum. I think it is a very good exercise to learn about the mechanics of a pipe and what makes a good smoker - you are bound to make mistakes, but that is good as long as you learn from them.

Get some cheap blocks to start with - you WILL mess up lots of blocks, so there is no use in destroying expensive pieces of wood. You could even get a non-briar species, like cherry (which is smokable). This way, your wallet hurts less everytime you screw something up.

Good luck.
The way to make people want to smoke your pipes is to develop a reputation for excellence in your work. This takes a lot of hard work and several years to accomplish, and there are no short cuts. You just have to keep at it. - Rad Davis
Post Reply