Etude #11, Freehand Poker

Want to show you work to the world? Want a place to post photos of your work and solicit the opinions of those that have gone before you? Post your work here.
Post Reply
User avatar
sethile
Posts: 770
Joined: Thu Nov 23, 2006 8:00 pm
Location: Murray, KY
Contact:

Etude #11, Freehand Poker

Post by sethile »

This pipe was partially inspired by the idea of combining the top of my calabash shape with the bottom of a modified poker, which I've had kicking around in mind's eye for a few months:
Image
Image
Image
Specs in inches: Bowl height: 2.3; width at top: 1.8; chamber diameter: .75; with a depth of 1.9. The over all length is 5.6.

Over all I'm pleased with this effort. The ebauchon block from Tinsky was really nice. Unusually wide, and must have barley missed being a plateaux. Skillfull blasting (like Rad's) would have yielded beautiful rings, and had it not been for a couple of flaws, it would have been a really nice straight grain. Still, the rustification scheme was in my original design and I think it turned out well. It was really exciting to see the nice birdseye on the top. The stem is hand cut from German ebonite.

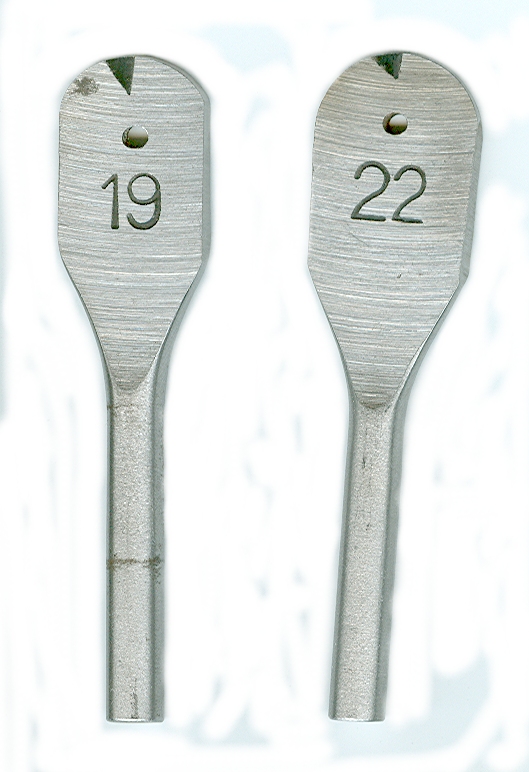
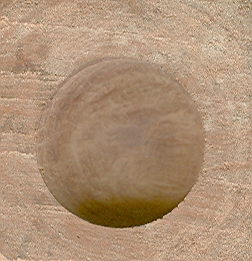
While not without issues, I think it's my best yet, and I'm going to allow myself to graduate to plateaux. I have one annoying problem with the bottom of my chambers. The spade bit I have from Pimo is just not working out for me. I use a short centering drill, then a 3/4" jobbers bit, and then follow up with the 3/4" modified spade bit. I often end up with small groves in the bottom, and a little breakout in the sides. I can sometimes sand these out, but was not able to eliminate them this time. I'm going to look into alternatives. The drilling on this worked out about perfectly otherwise.

I thought I'd ruined the pipe when I slipped with a letter stamp and gouged the shank. 8O I was able to recover without greatly compromising my shank shape, but now the stamping is not very well defined. I'm really looking forward to getting my own custom stamps!
Image
Image
Image
As always, tear it up folks. I'm here to learn. I appreciate all comments, especially those bordering on subjective aesthetics :wink:
Scott E. Thile
Collector, smoker, and aspiring pipemaker.
http://sethilepipes.com
Sysop: http://pipedia.org
---------------------
User avatar
mahaffy
Posts: 196
Joined: Thu Nov 23, 2006 8:00 pm
Location: Vermont
Contact:

Post by mahaffy »

Hey, Scott, it works for me. Very nice. Someone else can tear it up, maybe, but they're gonna have to work at it. Nice pipe, man.
User avatar
custom300
Posts: 118
Joined: Thu Nov 23, 2006 8:00 pm
Location: Chatham, Illinois

Re: Etude #11, Freehand Poker

Post by custom300 »

sethile wrote: I have one annoying problem with the bottom of my chambers. The spade bit I have from Pimo is just not working out for me. I use a short centering drill, then a 3/4" jobbers bit, and then follow up with the 3/4" modified spade bit. I often end up with small groves in the bottom, and a little breakout in the sides. I can sometimes sand these out, but was not able to eliminate them this time. I'm going to look into alternatives. The drilling on this worked out about perfectly otherwise.
Scott, nice looking pipe. I'm having the similar issues with my 3/4" spade bit that I got from Pimo. One thing slightly different, I do not drill with the 3/4" jobber bit. You might be getting some chatter as the flat bit goes into an already drilled hole. I tried resharpening the bit but still got the same result you describe. It was interesting that you raised this issue, because I was going to put a post out here this week, asking for suggestions and alternatives.
Blessing and Peace

Jamie
User avatar
flix
Posts: 522
Joined: Thu Nov 23, 2006 8:00 pm

Post by flix »

Hi Scott,

I really like the shape and finish of the pipe. I've been having similar problems with the Pimo bits. I'm about ready to get some regular drill bits and have them ground. I think it's around $100/ea. incl. the bit. It may be worth it.

BTW, I've been using Forstner bits, then following up with the Pimos to finish. The 2nd time I did this, I drilled too deeply with the Forstner, now I have a bowl with a ring at the bottom! I'll gift this to someone, not related! ;)

I think if you are patient, the bore can be drilled out using the Forstner/Pimo method. I'm still somewhat open to figuring it out, on scrap wood...
User avatar
Heinz_D
Posts: 163
Joined: Thu Nov 23, 2006 8:00 pm
Location: Stolberg/Germany

Post by Heinz_D »

Scott, this is a very nice pipe! I like the grain and the color on the border of the bowl! Very good work.

A poker isn't any of my favorites, but with this one it may be worth to think about the shape again...

I can't see anything from your disaster with the stamp, so you managed it very good, I think...

Your trouble with the drill bits is strange. I don't have the ones from pimo, because I make them myselfe:

Image


Just grindet them as I needed, but slowly with a dremel grindstone. You must be carefully to avoid overheating! But once the shape is done you can sharpen it realy good. Youst the angel of the blade which is cutting the briar has to be right! To get the right and regular curve you can use a fitting shim to mark the curve with a steel needle...

Working with 500 rpm I get very sharp and flat holes and I don't pre-drill with another bit:


Image


Only the temperature is a problem - I've to be very careful and lift the drill often to avoid burning the wood...
Greetings from Germany,

Heinz_D
User avatar
sethile
Posts: 770
Joined: Thu Nov 23, 2006 8:00 pm
Location: Murray, KY
Contact:

Post by sethile »

Thanks to all for the encouraging comments, and also the suggestions regarding my chamber drilling problem.

Heinz, thanks for posting the pictures of your modified bits. Yes, perhaps I need to do more careful grinding on mine. I am not following how you get the angle from the shim stock and needle. Can you please elaborate on this? I have done some sharpening on mine, but they obviuosly need more attention still. They are just not cutting cleanly. Also, do you use a pilot drill before using your modified bits? The picture you posted the hole is far cleaner than I've managed with any of mine so far.

Jamie, My experience sounds exactly the same as yours. Yes, it's very possible that using the 3/4 jobbers bit first contributes to the chatter when using the spade bit. Still I think some sort of pilot or centering hole must be needed to prevent the rounded spade bit from drifting. Perhaps one considerably undersized is worth experimenting with.

I'm also exploring some jobers bits custom ground by Trent Rudat that Jim Bacon recommended (also used by Scott Anderson and john Crosby). Jim may be posting pictures of them soon. It sounds as if these may be pretty reasonably priced compared to the others I've seen. If I get some I'll certainly post the results, and hopefully Jim will also post his experience with them.

This forum is a great. I really appreciate the help and feedback I get here. Thanks again folks!
Scott E. Thile
Collector, smoker, and aspiring pipemaker.
http://sethilepipes.com
Sysop: http://pipedia.org
---------------------
User avatar
bvartist
Posts: 463
Joined: Thu Nov 23, 2006 8:00 pm
Location: United States /Missouri
Contact:

Post by bvartist »

Nice pipe Scott! I like the contrast between the smooth top and the rustication. I've done a couple similar and they always look nice! Nice finish on the top of the bowl too!

I also use 3/4" S&D bit to start the chamber, but I only drill about 1/16" deep with it just to give me a conical guide hole and it works pretty well. I used to drill deeper with the S&D but usually ended up with a ring in the chamber.

Another suggestion, and I don't know if you've done this or not, but it helps to cut down the shank of the spade bit. The shorter length results in a more rigid bit that will be less likely to chatter.

Sometimes I think it could be the briar too. 9 out of 10 of mine may be smooth, and the other have chatter! But who knows! :dunno:

David
User avatar
Heinz_D
Posts: 163
Joined: Thu Nov 23, 2006 8:00 pm
Location: Stolberg/Germany

Post by Heinz_D »

Scott, to get the right angle just use a shim which is matching the size of your drill bit, fit it in the middle of the blade of the bit and draw the angle on the blade. If you adjusted it perfekt in the middle - nothing is looking over the border at on of the sides - you'll get a perfect symetry blade!

To sharpen the blades just follow the angels of the borders with a needle file ore a kinife sharpener. I use wood blade drills, don't know the english description, and form them to "spoon drills". They've original square blades and a spike. The angel of the cutting borders will met in the center of the spike, still after you've cut the spike away and rounded the blade. That is the critical point, because if you don't match this point your drill wouldn't result in a smooth tobacco chamber...

I don't use any pilot drill, but I drill very carefully and often clean the hole and allow the drill bit to cool down - otherwise you'll burn the wood!
Greetings from Germany,

Heinz_D
Post Reply