My First Engineered Pipe

Want to show you work to the world? Want a place to post photos of your work and solicit the opinions of those that have gone before you? Post your work here.
Post Reply
User avatar
hawky454
Posts: 220
Joined: Sun Jan 16, 2011 1:22 am
Location: Austin, TX

My First Engineered Pipe

Post by hawky454 »

Okay this is the first pipe I actually drilled myself from a plateaux block (not a kit) the stem is not hand carved it is a factory stem. I went with no stain on this one, I just buffed it. I need a lot of advice on this one here, for instance, I can not get the junction flush, I've tried everything! I'll leave the rest of the critiquing to you. Thanx
Image
Image
Image

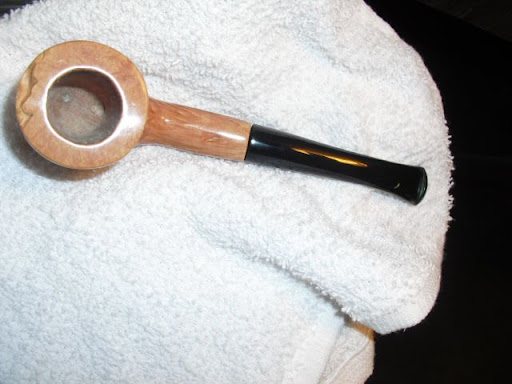
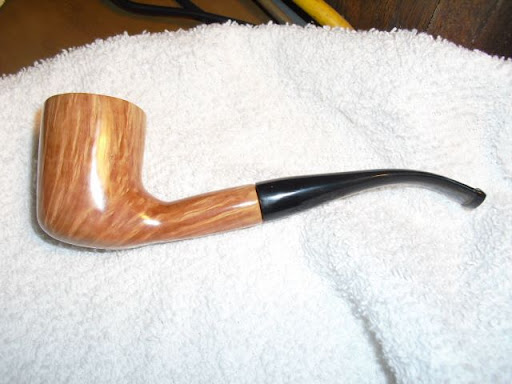
Sorry 'bout the lighting, I'm no photographer.
Last edited by hawky454 on Sun Mar 20, 2011 2:58 am, edited 1 time in total.
Go hang a salami I'm a lasagna hog.
mredmond
Site Supporter
Posts: 420
Joined: Tue Jun 30, 2009 11:53 pm
Location: Florida

My First Engineered Pipe

Post by mredmond »

It looks like the tenon is too long/the mortise is too shallow. Adjusting one of those should help. It also looks like you buffed the stummel and stem separately. To get a good flush fit, you need to shape and buff with the stem on. That will help avoid the rounded over edges.

Micah
User avatar
taharris
Posts: 675
Joined: Tue Dec 07, 2010 6:42 am
Location: Ohio
Contact:

Re: My First Engineered Pipe

Post by taharris »

You did a nice job for a first pipe.

You have the engineering part down, now you need to focus on the details.

The stem does not close up flush for one of two reasons. Either the tennon is too long and is bottoming out or the outer part of the stem or stemmel (or both) are not exactly 90 degrees to the mortis and tennon fitting. You can correct this but cutting a donut of sandpaper and sandwiching it between the stem and the stemmel and turning. For your next pipe pay close attention to the stem end of the stemmel and to the stem when forming the tennon. You want to make sure that you square up both of those surfaces while the piece is mounted in your chuck. An easy way to judge if you are square is to use a metal straight edge. Lay it across the surface perpendicular to the turning axis and see if you have any gaps as you look down from above. You may even want to turn the outer edge of the stem slightly bowl shaped (i.e. angled in) so that you know the outer diameter extends further along the tennon axis than the inner diameter. That way you have the illusion of a flush fit.

Here is what I mean (but exaggerated):

Image

The rest of the pipe looks good. You put a nice finish on it. You may want to spend a little more time refining the shape of the bowl and the transition between the bowl and the stem. Again, these are just details that you will learn to spot as you make more pipes.

Now, fill up the bowl with your favorite blend and enjoy a smoke on your new favorite pipe.
e Markle
Posts: 1081
Joined: Sun Oct 18, 2009 5:39 pm
Location: Phoenix AZ

Re: My First Engineered Pipe

Post by e Markle »

Nothing in the world wrong with you pipe; I bet it will smoke just fine. However, here's some feedback from one hobbyist to another. I'd sand a mm off of the bottom of your tenon and see if that helps the junction any. Like someone mentioned, you need to do as much sanding and all of the buffing with the stem in place to avoid the rounded edges. Be really careful about the lines of the shank. They should be smooth and flowing - you have a couple of abrupt lines. Finally, you really want to remove as much briar as you can at the shank bowl transition. You want it to be lean and mean; a nice curve is important, but there's a lot of excess there.

And here's the part where I stick my nose where it doesn't belong: someone at your level is wasting money buying plateau. Unless you have a money tree (in which case, I'm coming over right now), you should be buying the absolute cheapest blocks you can. In fact I'd call people (Pimo & PME) to see if they have any junk blocks that have cracks, fissures, etc that they'd give you a deal on. Just work the cheap stuff for now, and hone your skills - even if that means every block has a HUGE crack in it. You can acquire the exact same skill set with flaws in your pipes. Again, I realize that's none of my business so forgive the intrusion - just trying to help you out. Sorry for the long response.
User avatar
RadDavis
Posts: 2693
Joined: Thu Nov 23, 2006 8:00 pm
Location: united states/Alabama
Contact:

Re: My First Engineered Pipe

Post by RadDavis »

It looks like you over shot the smoke hole a bit and ran into the front of the bowl.

That aside, your other "First Pipe" looked much better at the shank/stem join. You need to sand those while they're attached to each other. It'll look much better that way.


Rad
User avatar
hawky454
Posts: 220
Joined: Sun Jan 16, 2011 1:22 am
Location: Austin, TX

Re: My First Engineered Pipe

Post by hawky454 »

Thank you kindly for the feedback. I too realized I shouldn't be spending that much money on a plateaux. Ha ha. I found a supplier for "practice blocks." I already bought 5 for $20 and they are exactly what I need! Some of the blocks are huge, so I plan on making 2 or 3 pipes out of the larger ones.

Yes, I wimped out when it came to the the shank/bowl connection, I felt that if I took anymore wood off, that I would have cut into the smoke hole (poorly executed.) I'll take more chances on these practice blocks. Mush less at stake....LOL...No, unfortunately I don't have a money tree.

Great advice fellas, I will apply those methods on my next attempt(s). So, as far as sanding while the stem is attached. Do you mean while doing the fine tuning by hand or when I'm working it on the sanding disc?

The illustration really helped, I'm gonna give that a go on this pipe cause that lil space bothers me.
Go hang a salami I'm a lasagna hog.
Charl
Posts: 1901
Joined: Mon Jan 07, 2008 3:03 pm
Location: South Africa

Re: My First Engineered Pipe

Post by Charl »

Now for the next one!
User avatar
taharris
Posts: 675
Joined: Tue Dec 07, 2010 6:42 am
Location: Ohio
Contact:

Re: My First Engineered Pipe

Post by taharris »

hawky454 wrote:So, as far as sanding while the stem is attached. Do you mean while doing the fine tuning by hand or when I'm working it on the sanding disc?
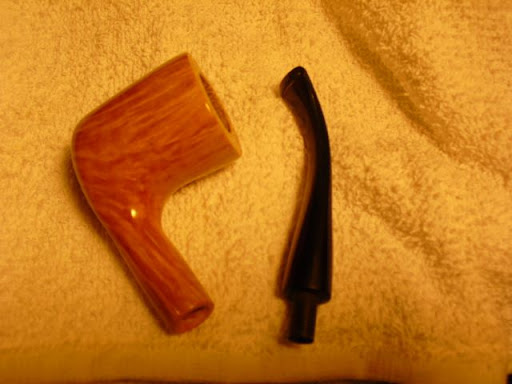
Both. Fit the stem as early in the process as possible and keep it on for as many steps as is practical.
User avatar
hawky454
Posts: 220
Joined: Sun Jan 16, 2011 1:22 am
Location: Austin, TX

Re: My First Engineered Pipe

Post by hawky454 »

Cool beans!!!
Go hang a salami I'm a lasagna hog.
User avatar
RadDavis
Posts: 2693
Joined: Thu Nov 23, 2006 8:00 pm
Location: united states/Alabama
Contact:

Re: My First Engineered Pipe

Post by RadDavis »

hawky454 wrote: So, as far as sanding while the stem is attached. Do you mean while doing the fine tuning by hand or when I'm working it on the sanding disc?
For a flush fit stem, you should never do any sanding at the stem shank join without them being joined.

Rad
User avatar
RadDavis
Posts: 2693
Joined: Thu Nov 23, 2006 8:00 pm
Location: united states/Alabama
Contact:

Re: My First Engineered Pipe

Post by RadDavis »

taharris wrote: You may even want to turn the outer edge of the stem slightly bowl shaped (i.e. angled in) so that you know the outer diameter extends further along the tennon axis than the inner diameter. That way you have the illusion of a flush fit.

Here is what I mean (but exaggerated):

Image
This can work ok until you try to make an oval shank. Then you'll have a light gap in the middle. :wink:

It's best to learn how to face the stem and shank properly.

Rad
FredS
Posts: 304
Joined: Mon Sep 22, 2008 10:21 pm
Location: Kansas City, USA

Re: My First Engineered Pipe

Post by FredS »

Before you start shortening the tenon, make sure it's really bottoming out in the mortise. It's hard to see, but in your last picture, it looks like there may be a pretty large radius in the corner between the tenon and the face of the stem. I can't tell if you have a chamfer on the outer edge of the mortise or not, but you need a chamfer there that is larger than the whatever radius is on the stem or it will not let it set flush.
"Cut your own wood and you warm yourself twice." - Henry Ford
User avatar
taharris
Posts: 675
Joined: Tue Dec 07, 2010 6:42 am
Location: Ohio
Contact:

Re: My First Engineered Pipe

Post by taharris »

RadDavis wrote:This can work ok until you try to make an oval shank. Then you'll have a light gap in the middle.

It's best to learn how to face the stem and shank properly.
Good point Rad.
User avatar
RadDavis
Posts: 2693
Joined: Thu Nov 23, 2006 8:00 pm
Location: united states/Alabama
Contact:

Re: My First Engineered Pipe

Post by RadDavis »

taharris wrote:
RadDavis wrote:This can work ok until you try to make an oval shank. Then you'll have a light gap in the middle.

It's best to learn how to face the stem and shank properly.
Good point Rad.
I speak from experience. :lol:

Rad
Post Reply